
Filmmaking can get expensive. Crew, sets, talent, lighting, post production, visual effects, and of course, cameras. The motion picture industry uses the best of the best cinema cameras, and for good reason: films need to look the best that they can.
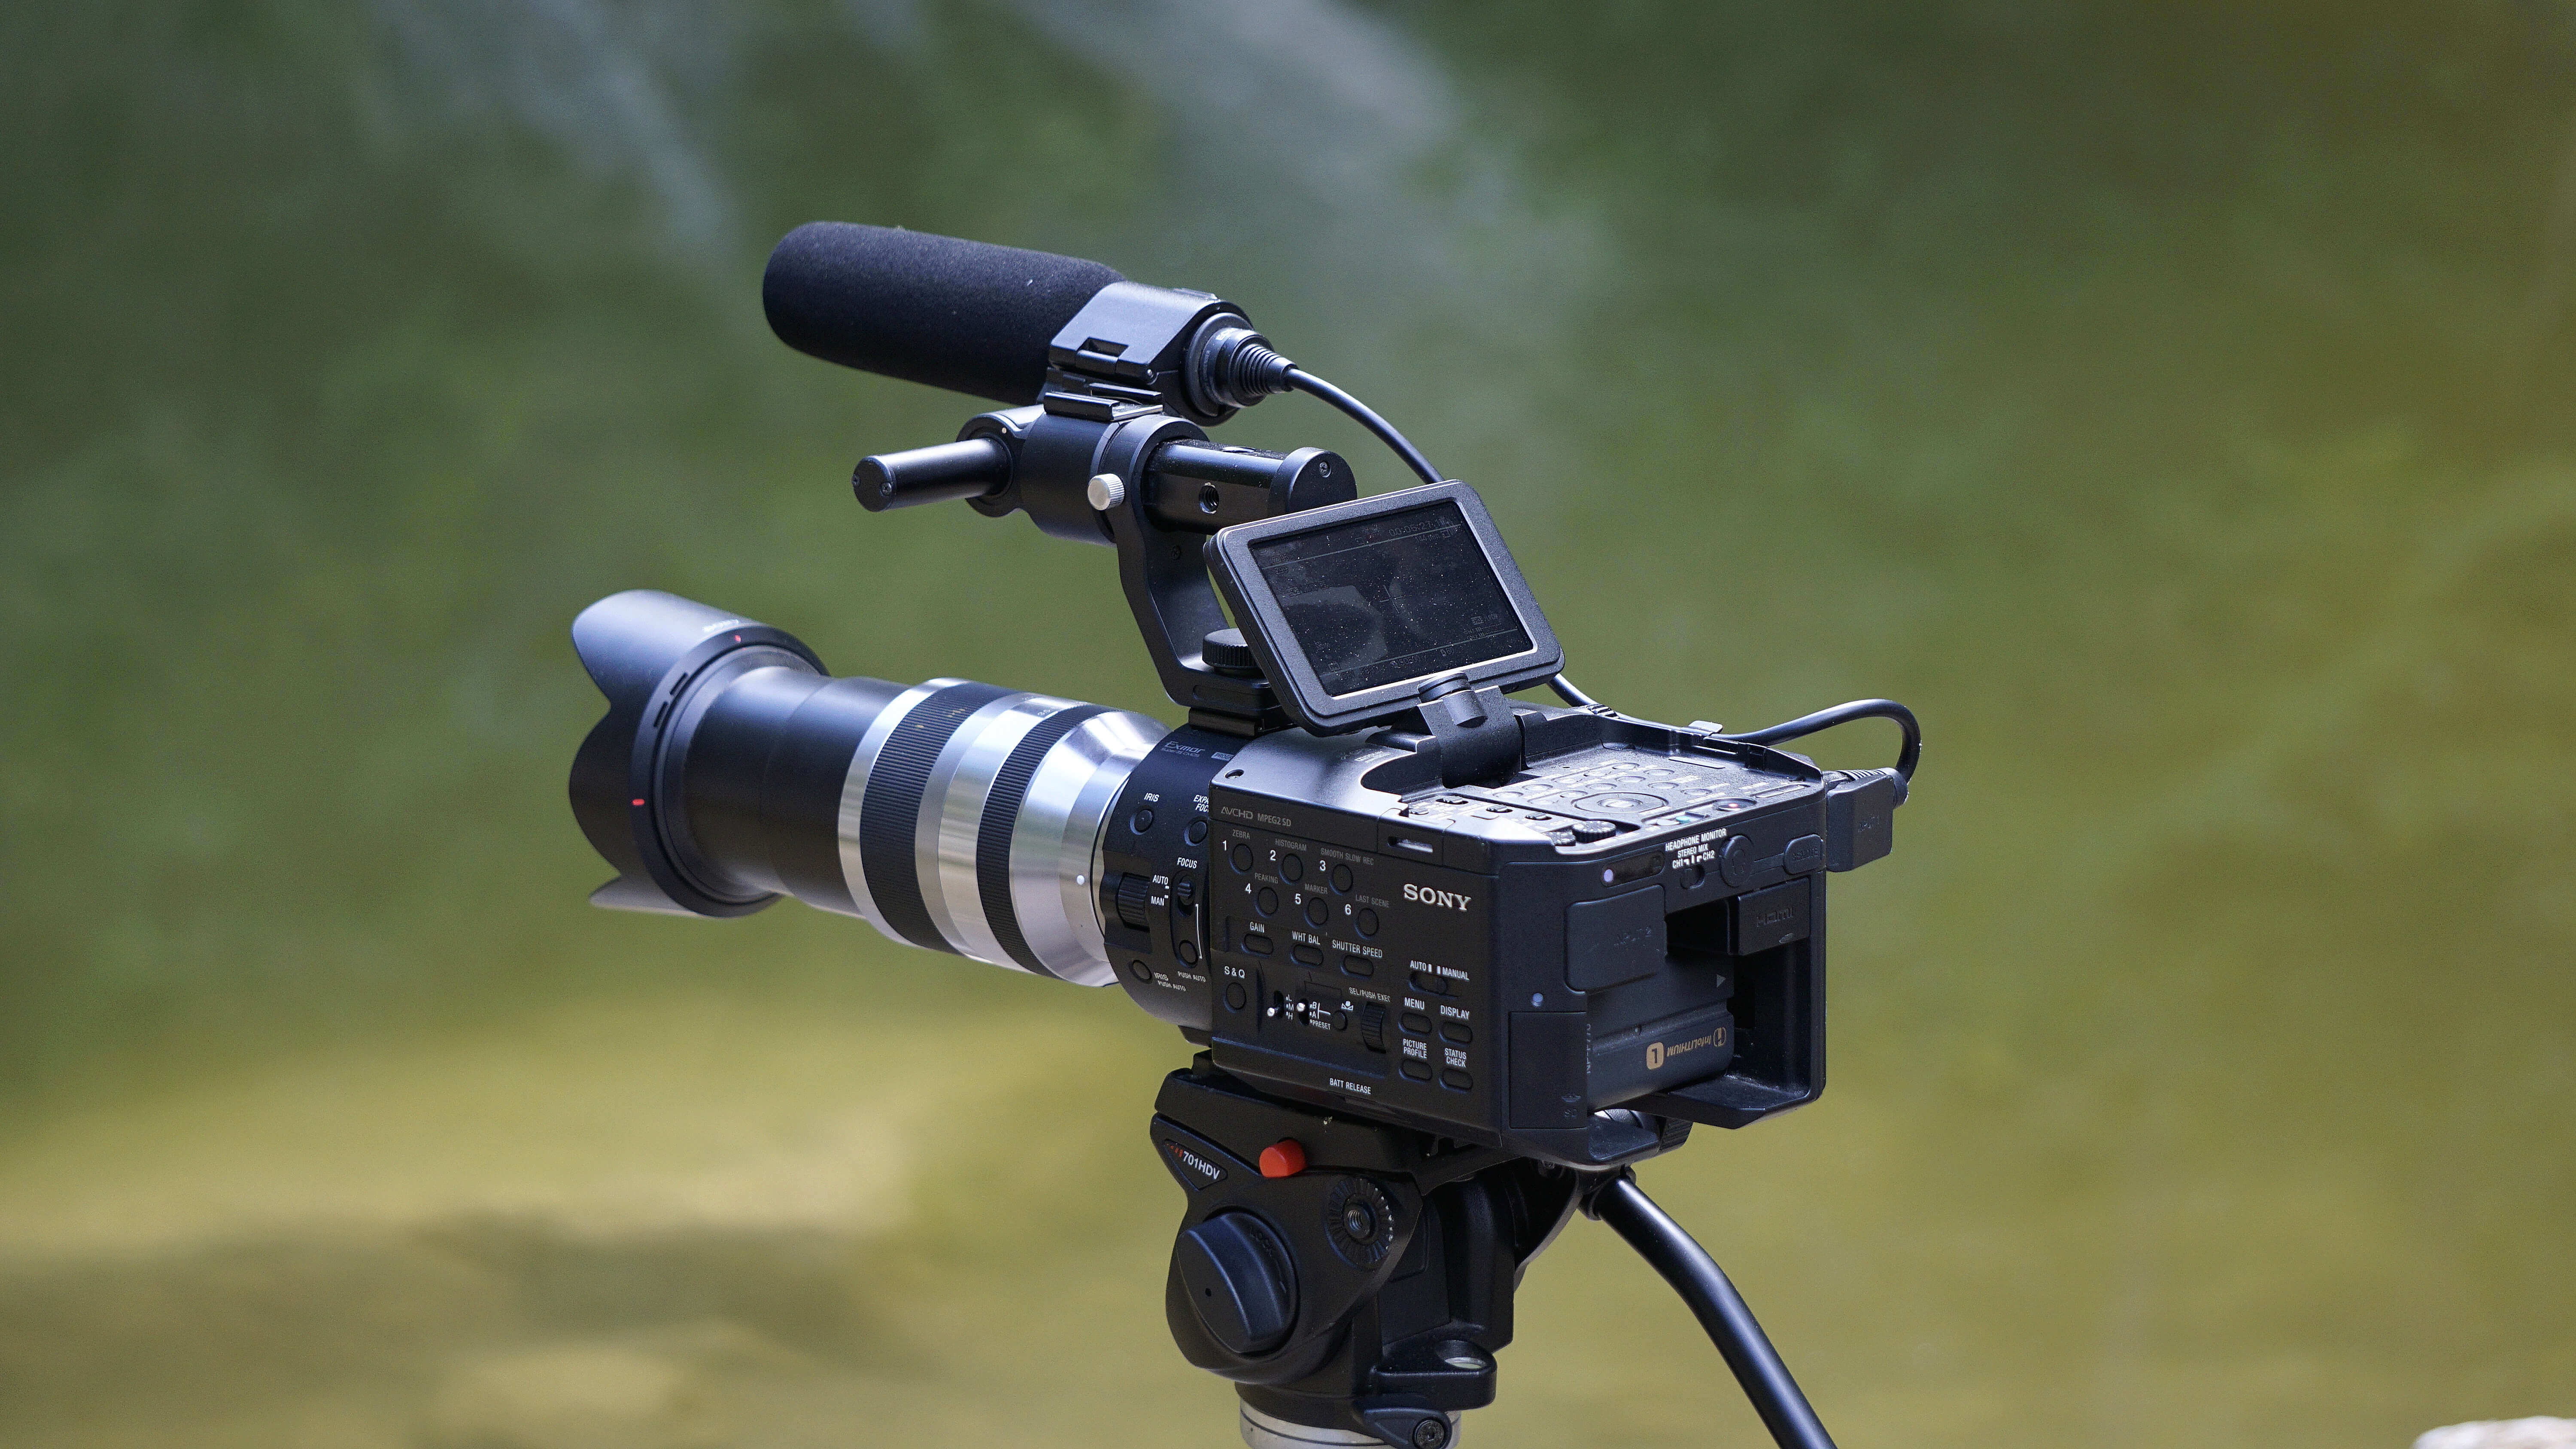
Cameras used on movie and TV show sets are often referred to as “cinema cameras”, and these are the workhorses of professionals in the industry out of the grasp of the everyday user or hobbyist. This has changed only very recently, and now these cinema video cameras are available to more users than ever.
But there is a lot to know about when getting started with cinema cameras, and that’s what we aim to demystify with this guide. Read on as we look into the technology, terminology, and concepts that need to be understood with these cinema cameras, along with our picks for the best cinema video cameras you may want to look into.
Note: This has developed into a very long and extensive guide. Please use the table of contents if you want to jump to our picks for the best video cameras below, or any other part of the post in which you may be interested.
Contents
- 1 What is a cinema camera, and what is cinematic video?
- 2 Film cinema cameras vs digital cinema cameras
- 3 Cinema cameras vs DSLRs and mirrorless cameras
- 4 Cinema cameras vs mobile filmmaking (iPhone video)
- 5 What to look for in a cinema camera
- 5.1 Resolution (DCI vs UHD, 1080p, etc)
- 5.2 Frame rate
- 5.3 Video codecs
- 5.4 Audio
- 5.5 Video output – HDMI vs SDI
- 5.6 Sensor size
- 5.7 Lens mount
- 5.8 Shutter type
- 5.9 Dynamic range
- 5.10 Log gamma
- 5.11 Low light performance
- 5.12 Battery life/power
- 5.13 Storage methods
- 5.14 Internal recording vs external recording
- 5.15 Stabilization
- 6 Our favorite cinema cameras (and cinema camera-adjacent cameras)
- 7 Cinema camera rentals
- 8 Final thoughts
What is a cinema camera, and what is cinematic video?
Plainly put, a cinema camera is a video camera that is designed specifically for shooting high-end motion picture footage for professional movies and TV shows. While all cameras with video capabilities can record video, they may not look great or have the right features to enable you to capture footage and create cinematic video footage, or a “cinematic look”.
While “cinematic look” is a highly overused phrase, it’s one that gets the general point across to most people the easiest. When you think of cinematic video, you think of movies and their specific feel on screen. This is different from the “video look”, which describes things like sitcoms, game shows, news broadcasts, and home video camera footage.
Before even getting into the cinematic post-processing that all movies and cinematic TV shows (think Game of Thrones, Daredevil, etc) go through, a majority of that cinematic feel comes from a few basic concepts:
- Frame rate: Cinematic footage is shot in 24fps (frames per second). The aforementioned “video look” content is shot at 30fps (or more specifically 29.97fps). We’ll cover frame rates more later.
- Depth of field: While not all shots in a movie make use of this (such as wide exterior shots). Most “video look” content is shot with narrow aperture, causing the whole frame (or most of it) to all stay in focus. Movies make use of shallow depth of field from wide open apertures to create separation in scenes, and this contributes to the stylized look of most movies.
- Image quality, bitrate, and dynamic range: The ability to completely manipulate the footage in post to the desired color, tone, and style is crucial in filmmaking. You need a camera that has the quality and depth to the image that will allow you to push your footage in post.

These are pretty much the three baseline contributors to getting what people refer to as cinematic footage, and any camera you choose should start with these capabilities at a bare minimum. There are obviously a ton of other elements that contribute to the look of your project, but these do a large amount of the work.
Good cinema cameras also have other features such as quality audio inputs, focus and exposure assist features and much more. These are usually features you won’t find on a normal video-capable DSLR or consumer grade video camera, so you’ll need a camera that’s loaded to the gills with these features. And these features are what we’ll look at next.
Film cinema cameras vs digital cinema cameras
Up until the past decade, the industry has stuck to their guns and used various types of film cameras that shoot on celluloid film stock, primarily because the quality and reliability of digital cameras really wasn’t there. While there was definitely some conceptual snobbery in Hollywood against digital cine cameras–and there still is, with some pros–things have changed and digital is finally a viable option for true cinematic motion picture projects.
If you wanted to make films in years past, you would have needed tons of money for some very expensive film cinema cameras or shoot your project on a lesser quality camera. In 2008, Canon unleashed the 5D Mark II, and the award-winning photographer Vincent Laforet directed the groundbreaking short “Reverie” with the new camera and the game was effectively changed.
What emerged from this was the DSLR video craze and ignited the arms race for affordable video cameras that are capable of making serious films. This has resulted in pretty much every camera released since coming with video capabilities to varying degrees. DSLRs no longer were solely for photography, and video became the next big thing.
In the past ten years since the 5D Mark II was released, we’ve seen an insane increase in video capabilities and quality, with both DSLRs and dedicated cinema cameras are now extremely affordable compared to decades past, and can bang out absolutely unreal results for that money.
Cinema cameras vs DSLRs and mirrorless cameras
If you would have suggested using a DSLR for professional video applications before 2008, you would have been laughed out of the room. Laforet proved that this was absolutely viable now that the 5DmkII was available, and cameras have only become exponentially better for video since then. But there’s still a gap between cinema cameras and consumer grade DSLRs and mirrorless cameras.
Predominantly, cinema cameras are larger in physical size because they’re meant for use in large rigs on set. They need specialized physical controls and specific outputs for industry-standard gear like monitors, power sources, timecode sync, and more.
DSLRs–and by extension, mirrorless cameras–have none of this heritage. They’re a body style that was designed purely for photography. No stabilizing rigs, no matte boxes, no external monitors or power sources. DSLRs are still photography cameras that have video features included. They may be very, very good video features, but they’re nowhere near the specialized professional devices that cinema cameras are.
Another key difference is the image quality that is recorded by each type of camera. Digital cinema cameras offer extremely high quality video files that are somewhat cumbersome for the average consumer to work with, nor would they need the overwhelming amount of data that they can provide.
Consumer DSLRs often shoot compressed video, which is much easier to work with at a cost of visual quality and post-production flexibility. It’s a capability that the average YouTuber may not actually need (nor want to deal with), but something that industry professionals absolutely need.
Cinema cameras vs mobile filmmaking (iPhone video)
We can’t deny the rise of smartphone video capabilities these days. Modern flagship phones are starting to tout 8K video recording capabilities, and the iPhone, in general, is pretty much the king of the ring for mobile smartphone filmmaking and video.
While you can absolutely put together an amazing and inexpensive iPhone video kit, you definitely won’t get the same quality of footage as a DSLR or mirrorless, and especially not on par with a cinema camera.
You can get a good “filmic look” or “cinematic look” with your iPhone with the right lens, recording app, and grading, but you definitely will be missing the noise performance, depth of field, and bitrate of a cinema camera.
Phones have too small a sensor to really compete with the physical size of DSLRs and cinema cameras, but if it’s all that you have, it’s absolutely capable of producing great footage for its limitations.
What to look for in a cinema camera
As we just mentioned, filmmaking requires more specialized features and functions than your everyday video. We’ve already touched on the fact that you don’t need a crazy expensive camera for shooting vlogs or YouTube videos (but don’t tell Jonathan Morrison or Marques Brownlee that!), but when you’re shooting films and other high-end video projects you need more.
It can sometimes be daunting when looking for getting into cinematography and filmmaking. A lot of these are new terms, or you may have heard them before and aren’t sure what they mean. So without further ado, let’s get through the nitty gritty and demystify what these mean when looking for the best video camera for your projects and why you need them.
Resolution (DCI vs UHD, 1080p, etc)
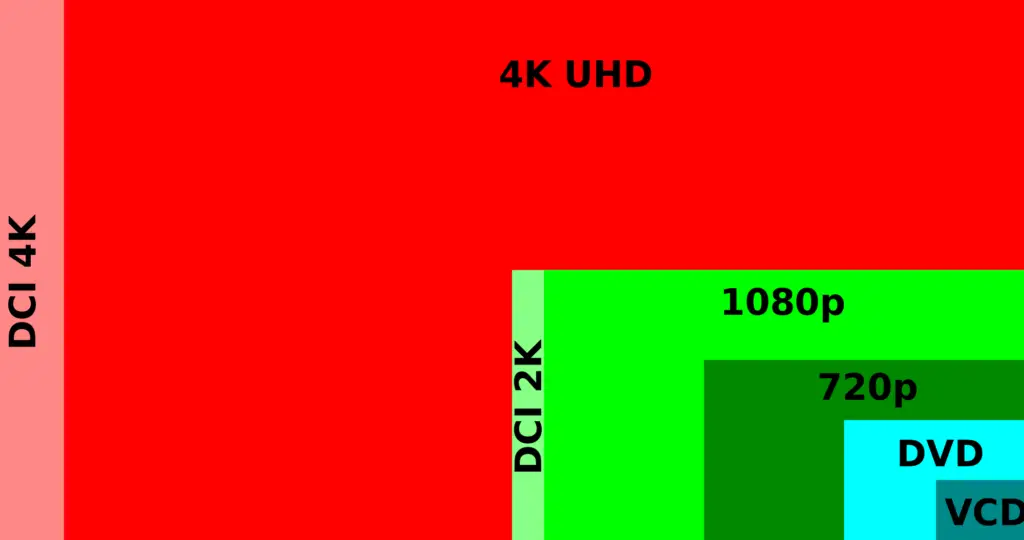
This is a pretty easy one to start off with, so we’ll get it out of the way now. Most people are familiar with the terms HD and 4K these days. But there are actually some interesting slight differences and choices to be made before hitting record for the first time.
The resolution for full HD is 1920 x 1080, or 1080p. TVs and monitors typically use what’s called 4K UHD (ultra high definition) which has a resolution of 3840 x 2160. While technically it can be referenced as 2160p, no one really ever does. Both of these resolutions are in a 16:9 aspect ratio.
DCI 4K is slightly wider with the same vertical pixel count, sitting at 4096 x 2160. This resolution is what cinema projectors use, and as such is the format you need to shoot in if you want to deliver your project to theaters. DCI 4K has an aspect ratio of 1.9:1. In other words, it’s almost exactly twice as wide as it is tall, or 2:1.
An interesting note from this point is that with modern smart phones becoming fairly tall, they’re averaging a ration of 18:9 (when held in landscape orientation, or 9:18 when held normally). This actually is a 2:1 ratio, close to DCI 4K.
But you’ll find that many online creators, such as the aforementioned Jonathan Morrison of TLDToday, are actually posting videos in a 2:1 aspect ratio to cater to mobile phone viewers, and more are adopting the practice as we go along. When viewed on a 16:9 display like your TV, this actually will create letterboxing and give the black bars at the top and bottom of the screen and adds to the cinematic feel of these channels’ videos.
But long story short, you’ll want to not just have 4K for future-proofing for online video, but DCI 4K if you plan on theatrical releases. Even if you plan on delivering 1080p finishes, shooting in 4K will allow for reframing your shot in post and/or downsampling 4K footage to 1080p, resulting in very sharp HD footage.
Keep in mind, however, that as you start shooting in 4K, 6K, 8K, etc (especially in certain compression, bit-rate and bit-depth) you’ll need to have a more and more powerful computer to edit that footage. We’re still a ways off before 8K is standard, but even high data rate 4K can be intensive. This means that you may need to upgrade your desktop or grab a new video editing laptop that can handle the larger files.
Frame rate
Next, let’s look at frame rate. Basically, this describes how many images are recorded or drawn on the screen per second. Believe it or not, frame rate has a huge impact on what your footage will look like.
Cinema has been shooting and projecting movies at 24fps (frames per second) for almost as long as movies have existed. Because of the established format, we associate the look of 24fps with “cinematic”. So if you want that look, you’ll need to shoot at 24fps. The exception here is unless you’re shooting for broadcast TV, which needs to be at 23.976 for multiple reasons we don’t need to get in to.
TV shows look different because traditionally they’re shot on tape instead of film due to budget constraints and turnaround time for expediting the production process. The TL;DR of it all is that sitcoms, game shows, and news shows use a 30fps frame rate.
It gets a bit complicated, so check out this info about modern video standards over on Wikipedia for some great in-depth info. Either way, the aforementioned “video look” content is shot at 30fps (or more specifically 29.97fps)
The video look is more “life-like” because 30fps captures more natural movement with less motion blur and looks more like the real world our eyes see. Shooting in 24fps creates a more stylized, less smooth look, and we just associate it with movies as opposed to 30fps, which feels like TV.
The only reason why we associate these looks is because we’ve been trained to do so, based on the content we’ve consumed while growing up. We know that movies look a certain way, and broadcast TV looks another way.
What if you want to shoot slow motion footage? You need to shoot at a higher frame rate than 30fps. If you shoot at 60fps and reduce the clip speed to 40%, it matches perfectly to a 24fps timeline and gets some decently dramatic footage thanks to the slower playback speed. If you need even more slowness (dramatic feel), you can shoot in 120fps or higher, and slow down accordingly.
Unfortunately, there’s really no shortcut to getting this dramatic look in post when shooting at a normal 24fps, so if you want that cinematic, dramatic, and epic footage, shooting at the higher frame rate and slowing down to the appropriate speed in post is a must-have, and you’ll want a camera that preferably can do 120fps at 4K resolutions.
Video codecs
When looking for the best cinema camera for your needs, you’ll want to look at to which codec(s) the camera can record. Codecs are a huge part of what makes a cinema camera what it is, and there are different codecs that suit different needs.
What is a video codec?
A codec is basically a method of encoding and decoding video content with compression (COmpress/DECompress). Video is a large format when not compressed, so there needs to be compression used to make those files a reasonable and manageable file size.
The codec is usually referred to by a name that the developer creates, and is often built on a differently named compression format. It can seem a bit odd at times, and it doesn’t really merit going into the details, but just know that there may often be different terms for the same thing in a sense.
At this point, there are a handful of widely used codecs, and not all are created equal. Some offer much higher compression rates, but at the cost of lower visual quality. Not all cameras support all of the higher quality codecs, and choosing the cinema camera with the right codecs for you will be a crucial point depending on what your end goals and workflow look like.
Codec terminology
Keyframing (long-GOP and intra-frame codecs)
Some codecs can further support different profile types that all have certain capabilities and features. Again, not going to dive fully into this, but the main part is to take a look at whether a codec is what is called a long-GOP codec or all-intra frame codec.
If you want a deeper look into the technical details on long-GOP versus intra frame codecs, check out these articles from Larry Jordan, Premium Beat, and Frame.io. But for now, here’s the short short versions.
- Long-GOP compression: A higher compression rate accomplished by starting with a group of pictures. The first frame is a full intra keyframe, and then the following frames are just the changes from the previous intra keyframe. The frames between the full intra frames are actually only the differences recorded by the sensor from the previous frame. These files play in the forward direction without issue, but have problems skipping around, scrubbing backwards, and other non-straightforward play actions.
- All-intra frame compression: This compression is the opposite of long-GOP–plays in all directions without issue, uses full intra keyframes to record all actual changes instead of just the difference between frames, but results in larger video files, often about three times the size. Despite being harder to manage due to the larger file sizes, the editing process will be much easier and don’t necessarily require transcoding to another all-intra frame codec. If you have the storage and bandwidth for the larger file sizes and/or have a slower CPU/GPU, this is a good option for you.
Lossless vs lossy
These terms refer to the type of compression the codec uses. Lossless compression is a lower compression ratio (meaning the file size isn’t decreased as much), but there are no details lost in the compression process. These increase the quality of the video clip at the expense of larger file sizes.
Lossy compression is the opposite–smaller file sizes, but you do lose some data in the file due to that compression. There are varying degrees to which a codec may be lossy, usually depending on the compression ratio. The more lossy a codec, the lower quality the clip, and the more it will break down and degrade when color correcting and grading that clip.
Some compression is referred to as “visually lossless”. This is a middle ground between lossy and lossless. While there is compression going on, and technically some data is thrown out, you can’t actually discern that loss of quality with your eyes. We’re seeing more and more visually lossless codecs out there, and it’s a great compromise between quality and convenience.
Bitrate
Bitrate defines the amount of data per second that the codec is capable of carrying, usually measured in megabits per second (MB/s). The higher the bitrate, the more data it can record or play back. On the other side of it, however, the higher the bitrate, the larger the file size.
Many cinema cameras will offer between 100MB/s and 400MB/s, depending on the resolution, frame rate, and whether it’s a long-GOP or intra-frame/all-i compression.
That’s still a considerable amount of data even on the lower side of things; the bitrate for a DVD is about 9.8MB/s, 1080p Blu-ray is 40MB/s, and even YouTube 1080p 60fps using H.264 streams at 6.8MB/s. Even the Filmic Pro mobile video app has a Filmic Extreme codec that just got bumped up from 100MB/s to 130MB/s late 2018.
As a point of reference, full 10-bit 4:4:4 uncompressed 1080p 24fps video has a bitrate of about 1.4Gbps (gigabits per second–a gigabit is 1024 megabits).
The reason for having a higher bitrate is for more color depth and more details. With more data, you can really push the colors and exposure further before the image starts to get degraded and the colors begin artifacting. If you’re going to be heavily color correcting and grading, you’ll want as high of a bitrate as possible.
Bit depth
Where bitrate is the amount of data transferred per second, bit depth describes exactly what levels of data can be conveyed in an image. Bit depth is described in the number of bits that are used to describe the colors that can be reproduced.
Starting with 8-bit color as the baseline for monitors and video, each of the red, green and blue channels are capable of carrying 256 distinct possible values. Between all three channels there are a possible combination of about 16.7 million colors, and is the most common bit depth in consumer grade equipment.
This may sound like a lot of colors, but it’s still not enough to create smooth, natural looking gradients from one color range to another, especially when color grading gets aggressive. For that, there’s 10-bit and 12-bit color.
Jumping up to 10-bit colors opens the possible colors to just over a billion different colors. This comes at an increase in file size of around 20%, which is a quite reasonable increase for the performance gains granted. Moving up to 12-bit color jumps the depth up to about 68 billion colors.
The editing possibilities and natural-looking gradients with 12-bit color is unreal, and is becoming more and more popular. Even the newly announced Blackmagic Raw format supports 12-bit raw video. 14-bit color is poised to be more available as well, with the speculation of several cameras coming out in 2019 offering 14-bit raw output.
Just like with bitrate, the higher the bit depth, the better the visual quality and post-processing flexibility. As mentioned before, higher bit depth does contribute to higher file size, but the benefits to visual quality do justify the increase file size cost.
In general, if you’re doing serious video and grading work, you’ll want at least a 10-bit recording, even if that’s only available via external recording (more about that soon).
Chroma sub-sampling
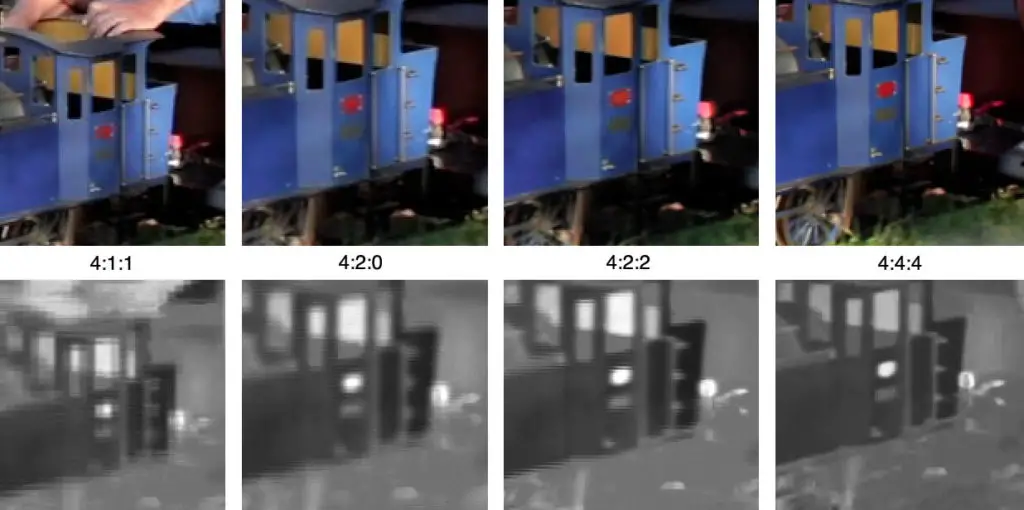
You may have seen codec features listed as a series of numbers like 4:4:4, 4:2:0, or in the case of ProRes profile names, ProRes 422. This is the description of the type of chroma subsampling used in the codec. Chroma subsampling is a way of compressing the image in a manner that favors keeping luma (brightness) data while losing some chroma (color) data.
Chroma subsampling is, in my opinion, probably the least understood component of codecs, and for a good reason. It’s a fairly technical concept while still often being at the forefront of codec discussions, and it does impact your video quality–especially under heavy color grades.
The short version is that due to human vision recognizing changes in brightness far easier than changes in color, you can compress in a way where you knock down some of the color info while retaining the brightness. This allows for cutting down on data bandwidth while still retaining a quality image.
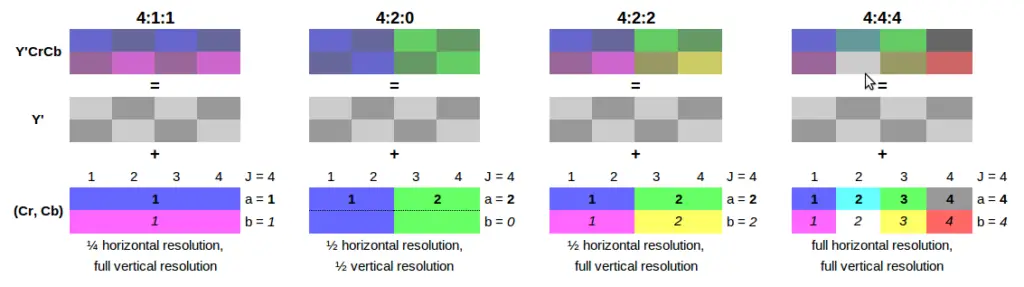
When describing subsampling, the common terminology is J:a:b, where
- J is the total number of luminance samples being taken
- a relays how many samples are taken in the upper row of pixels, and
- b indicates how many samples are in the lower row
This ends up looking like 4:2:0, or 4 total samples, 2 upper row samples, and zero lower row samples in a sample block 4 pixels wide by 2 pixels tall.
4:2:0 is the most common subsampling found in consumer cameras, TVs, and media equipment. Even Blu-ray discs are at 4:2:0. This is fine for finished products like broadcast TV and Blu-Ray discs, as well as cellphone cameras and most DSLRs and mirrorless cameras.
With 4:2:0, we have the full luma sample horizontal and vertical, and out of the 4 pixels across we divide that into 2 samples (columns 1/2 and 3/4) because of the second value in the term. But because the third value is 0, we are only sampling the 2 samples from the top row, not the second, and that means that the color values from the top row essentially carry over to the bottom row, saving the bandwidth that those samples would have convey.
The luma value, however, is still shining through across all 4 samples on both the rows. Even though we don’t have full color samples on that bottom row and only half the samples on the top row, the luma values still carry through and convey detail–just not entirely color-accurate detail.
When you’re only carrying half the samples of the top row and none of the bottom row, you end up saving tons of space in the encoded file, and is the whole reason for chroma subsampling in compression. The next popular step up would be 4:2:2, which is essentially the same as 4:2:0, but also includes the samples in the bottom row. You get twice the number of samples, but still have a decent savings in bandwidth over full 4:4:4.
Chroma subsampling of 4:4:4 is actually the complete lack of subsampling. Across all 4 columns of samples, you get 4 samples on the top row, and 4 on the bottom. None of it is guesswork or carry-over from the top row, and no columns are combined into simplified sample groups.
If you’re working with the best of the best quality and raw video, you’ll most likely be using full 4:4:4 video. The file sizes are insanely huge, however, as you’re not compressing any of that chroma data. 4:2:2 samples the two chroma components at half the rate of the luma, and gives about one third the file size of 4:4:4. 4:2:0 gives great visual quality at about a quarter of 4:4:4 video, but isn’t the best option for color correction and color grading
There are other subsampling rates in use, such as 4:1:1, 4:1:0, or even 3:1:1, but these days with modern cinema cameras you really don’t need to concern yourself with anything but 4:2:0, 4:2:2, and 4:4:4.
Just know that the higher the numbers, the more total samples being carried, but will also bring higher file sizes. If you want higher visual quality and the flexibility to push footage in color grading, stick to 4:2:2 or better and your footage will thank you.
What are the best codecs for filmmaking?
Let’s take a look at some of the more popular codecs found in popular cinema cameras. We won’t cover all codecs (like ARRIRAW and REDCODE RAW), but just the ones that really matter for the majority of people reading this guide.
As usual, these can get very complex, so we’ll provide a good overview, and you can go check out the full details if you feel the need.
x264/x265
The x264 and x265 are more or less open codec standards, and are used by the majority of consumer grade cameras out today, including your smartphone. The codecs use compression formats very similar to codec names.
The x264 codec uses the H.264 compression, which is basically the next evolution from MPEG-4. After x264 started hitting its limits, x265 was created, and uses the H.265 compression (or HEVC).
Apple has started moving to HEVC, and is also available on many DSLRs/mirrorless and Android devices as well. It offers the most hardware acceleration support, adding both Nvidia CUDA and AMD hardware acceleration to aid in playing back and editing media. H.264 only supports OpenCL and Intel AVX.
These are excellent codecs for smartphones, small mirrorless cameras, and other consumer grade cameras. They are highly compressed formats and don’t necessarily take extreme color grades very well, and H.264 can often play back and edit with extreme performance degradation, especially if using a long-GOP version of the codec.
The down side to these codecs is that when brought in for editing and color grading, the footage will break down when you start pushing the grade past moderate color correction. You can definitely get work done, but just don’t expect saving over/under-exposed footage or similar mistakes.
ProRes 422/4444
Apple developed and released the ProRes codec in 2007 primarily for use as an intermediate codec used for post-production. It’s an easily editable codec, and is very popular within the industry.
The most common version used is ProRes 422, and unlike x264/x265, supports 10-bit color at multitudes of resolutions and bitrates all at its namesake’s 4:2:2 chroma subsampling (more on those last two later).
ProRes 4444 is the higher quality big brother to ProRes 422, allowing for 4:4:4 chroma subsampling and up to 12-bit color depth and a much higher bitrate.
The unfortunate part with ProRes is that you can’t actually encode these files on Windows, with a few caveats. Apple protects the license of ProRes and doesn’t make an official channel for developers to use the codec in Windows applications.
The first of two exceptions are the Windows ProRes project, which is an unofficial, unlicensed, unsupported version of ProRes encoding, and in general works pretty well.
The second is a more official option, with Adobe now supporting ProRes encoding on Windows starting with Adobe Premiere CC 13.0.2, along with the correlating versions of After Effects and Media Encoder.
You’ll find that many cinema cameras do record in ProRes in varying support of profiles and versions, and makes an excellent shooting and editing codec, especially if you’re on a Mac or using Adobe Creative Cloud.
DNxHD
Avid Technologies, the developers of the industry-standard editing suite Media Composer (along with current owners of M-Audio, ProTools, and much more), created DNxHD in 2004, and is basically thought of as the Windows equivalent to ProRes.
Much like ProRes, there are different versions of DNxHD with various quality support, but unlike ProRes, there are also different versions for various resolutions. It makes learning the use of the codec a bit rough at first, but it’s worth learning.
DNxHD works quite well as both a shooting and editing codec, and will be much less resource-intensive than something heavily compressed like x264. The codec does support 10-bit color depth at mostly 4:2:2 subsampling, although some versions will support 4:4:4 in some resolutions.
It does require the download and installation of the Avid DNxHD codec installer, but other than that, it’s ready to go right away. If you’re editing in Windows in an editor other than Premiere Pro, this is an excellent codec to work in, especially if your camera records directly to your desired codec.
AVCHD
In 2006 Sony and Panasonic jointly developed the AVCHD codec for use in their consumer grade and professional cameras. The codec uses MPEG-4 H.264 compression technology and can be found in multiple cameras from more than just Sony and Panasonic, including Canon, JVC, and even Leica.
AVCHD is a widely supported codec and is easy to work with, however, being a long-GOP codec it still causes a performance degradation during editing. There is an AVC-Intra version of the codec that offers intra-frame compression and is offered on professional Panasonic cameras.
Basically, AVCHD is equivalent to x264, and handles exactly as such. If you have the option to shoot in a higher quality codec and space isn’t a constraint, you’ll want to go with that option, but AVCHD is still a viable format for projects that don’t need much post-production.
CinemaDNG
Adobe created their own version of photography RAW formats, called DNG, and pledged it as an open solution for any manufacturer to use, as an alternative to the proprietary formats such as Canon’s CR2 and Nikon’s NEF RAW photo formats. I’ve used DNG with my Canon DSLRs for close to a decade now, primarily for its openness and more friendly feature set.
CinemaDNG is basically the same concept, but for video formats. Unlike the codecs above, CinemaDNG is considered a raw video format, meaning that it’s saving exactly what the sensor captures, instead of a compressed version, which loses details. If you’re familiar with RAW format in photography, you know exactly how powerful this can be during editing.
Being a raw video codec, CinemaDNG files can typically be pretty big. The quality is there, but you do need to have the extra means with which to manage and work with the larger files.
Several cameras do support saving CinemaDNG, and if you absolutely need the flexibility of a raw codec along with the horsepower and storage to edit and archive the footage, it’s a good way to go.
Blackmagic Raw
In late 2018, Blackmagic Design announced their new Blackmagic Raw format. Blackmagic is known for advancing the technology available in fairly affordable ranges, along with true pro-level production gear. Their new raw format holds extremely true to this.
Blackmagic Raw can provide extremely high compression rates without losing any visible quality from an uncompressed raw file. It’s built out as a modern codec, supporting multi-thread processing to take advantage of high core count CPUs that are everywhere today. Plainly put, it’s been designed to shoot efficiently and edit extremely fast despite its options to use high compression rates.
Speaking of high compression rate, Blackmagic Raw supports up to a 12:1 compression ratio, which is absolutely mind-boggling when you really think about it. It’s not necessarily visually lossless at that point, but it’s easily at least as comparable to x264 if not better.
Even though this is a new codec and not many cameras support it yet, it’s definitely pretty groundbreaking in its technology, and should be a pretty interesting future for the codec.
Audio
Audio quality is possibly the most important part of videos, even more than crisp visuals. With filmmaking and other professional level video, however, it’s a bit of a different situation than your usual YouTube video production.
When working on professional projects, primary audio is typically recorded to an external recording device, such as a field recorder. The mics run to this recorder, and then the audio is synced up with the footage in post-production, either by comparing it to the audio from the camera (referred to as scratch audio or a scratch track, which is a placeholder) or synced up using SMTPE timecodes.
Timecodes are an easy way to sync up multiple cameras, field recorders, and clappers for noting takes and scenes, but with software solution that will automatically sync audio tracks (such as PluralEyes or the built-in sync in Davinci Resolve, for example) you don’t necessarily need timecodes for the audio sync, especially on smaller size projects.
Thankfully, many cinema cameras today have amazing audio capabilities, such as clean, quiet mic pre-amps and XLR inputs. This allows the use of pro-level mics directly into your camera and eliminating the need for an external recorder. You’ll see this much more often these days, especially on smaller projects.
Video output – HDMI vs SDI
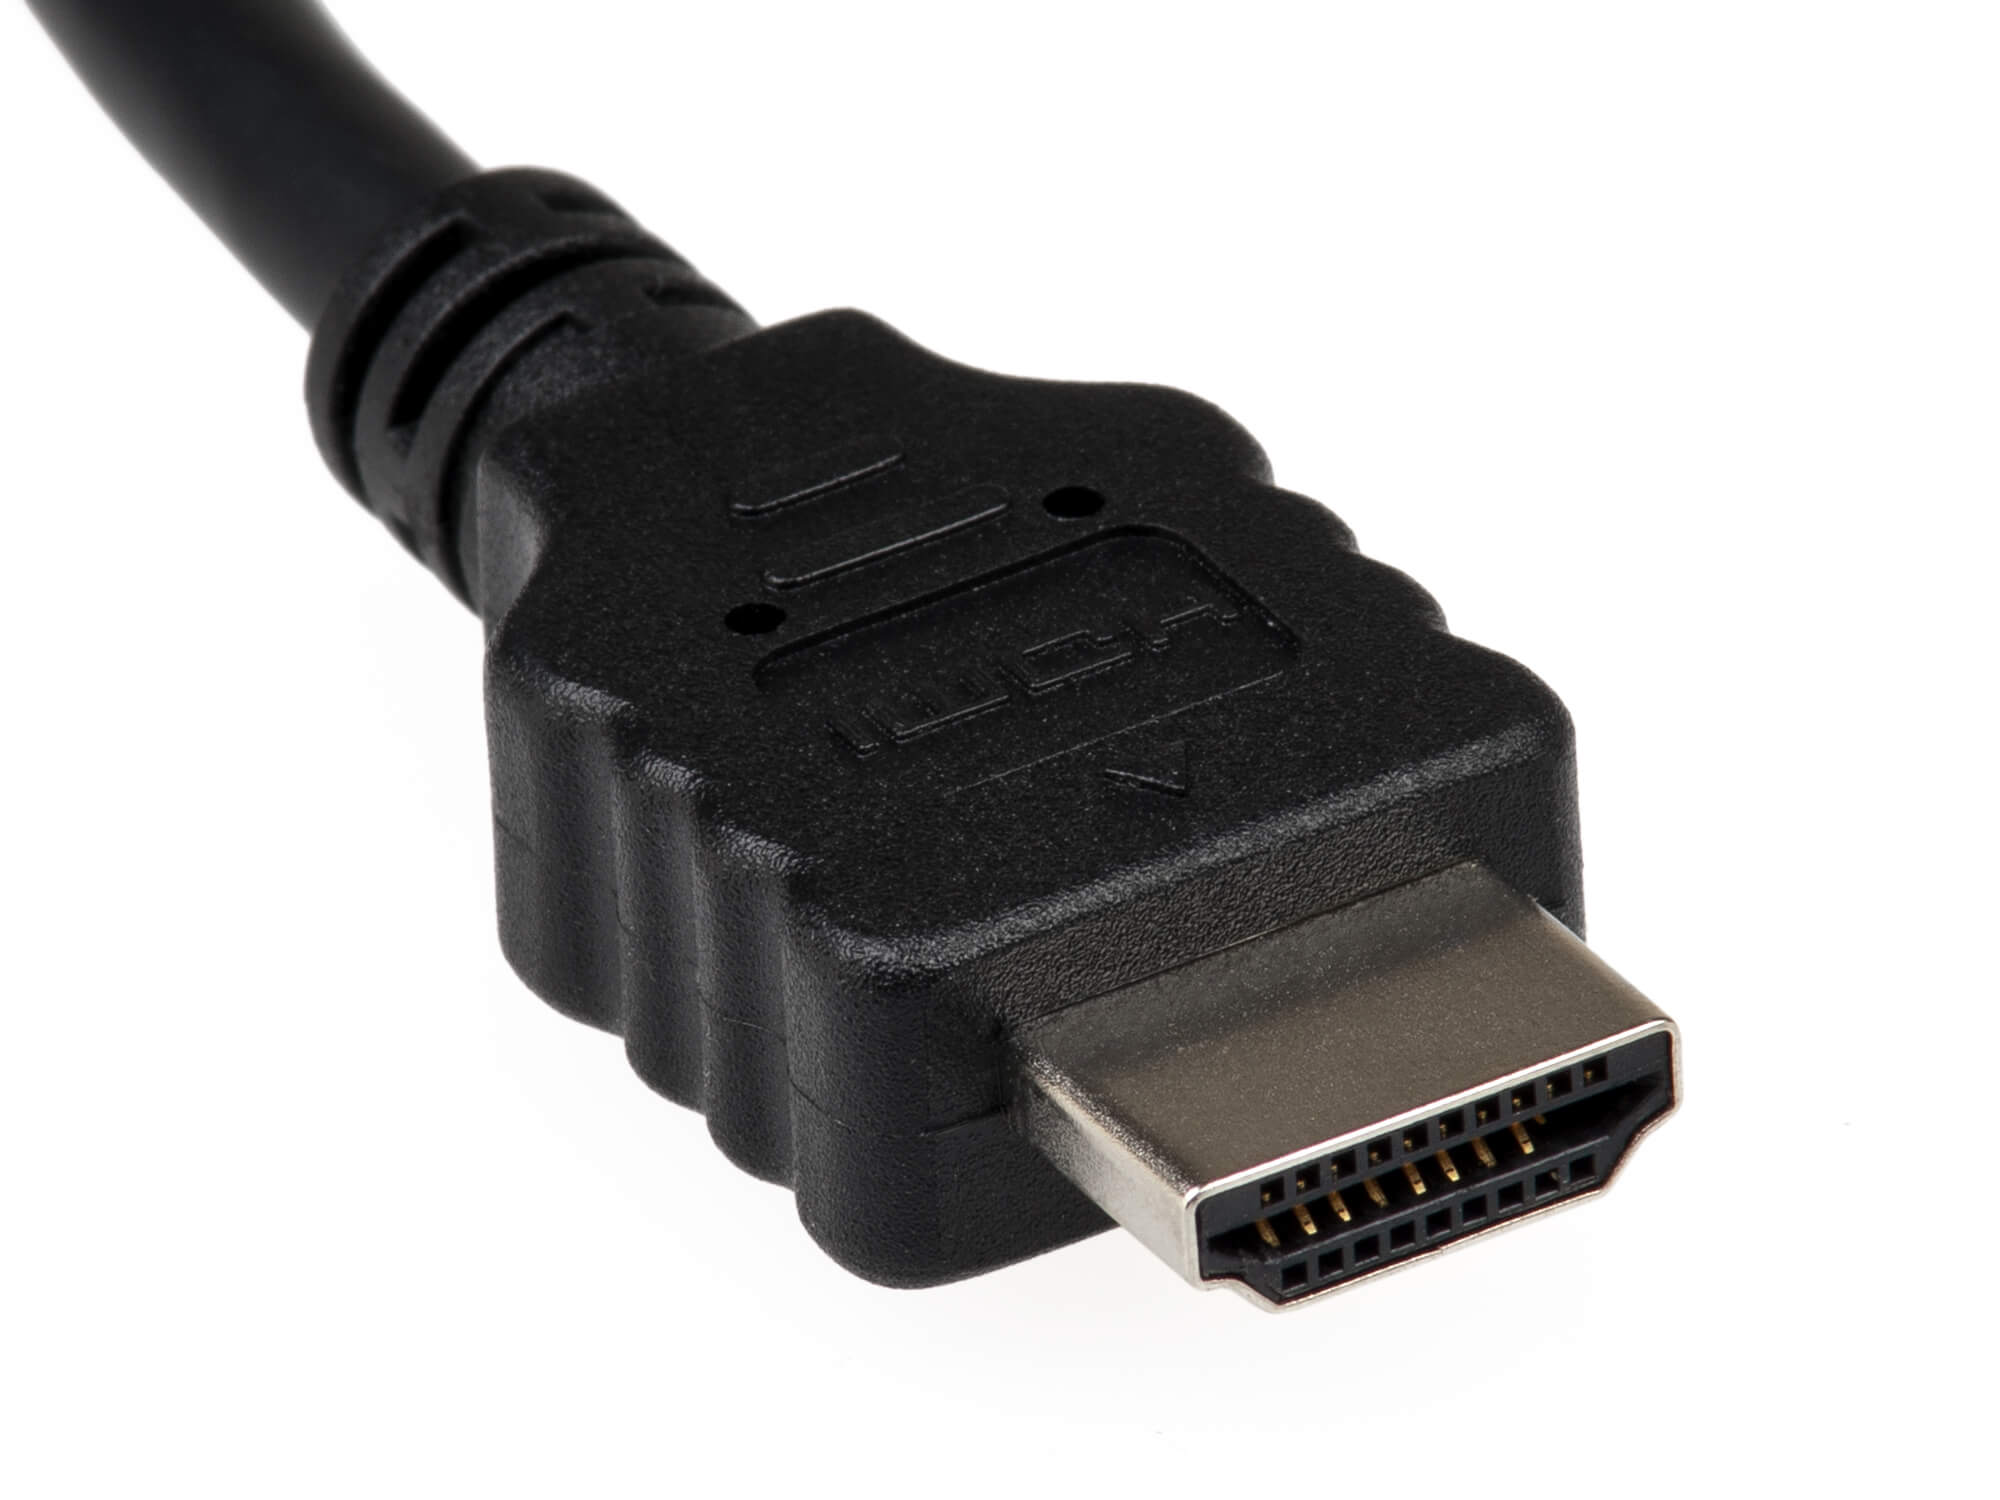
Most cameras these days have some sort of video output, usually in the form of HDMI, mini-HDMI, or even micro-HDMI on things like action cameras. This is the same HDMI that you’d use for your home TV, computer, game console, and more. Nothing really groundbreaking here, just good ol’ standard HDMI output.
On high-end cinema and broadcast cameras, however, there’s typically been a different kind of output, called SDI, or serial digital interface. SDI comes in various standards supporting different bandwidths and resolutions.
Functionally, there’s not much difference between HDMI and SDI in most instances. Consumer and hobbyist level gear will almost never have an SDI out, but cinema cameras are being equipped with HDMI outputs more and more due to it’s proliferation on mainstream cameras.
HDMI does have a few drawbacks, such as the connector itself. It’s less durable than SDI (that goes double for mini and micro HDMI), and pretty much never has any sort of locking mechanism to ensure that the cable doesn’t get unplugged on accident while on set. SDI’s twist-lock BNC connectors are rock solid, however, and will take a lot of abuse and mismanagement to get it unplugged without intention.
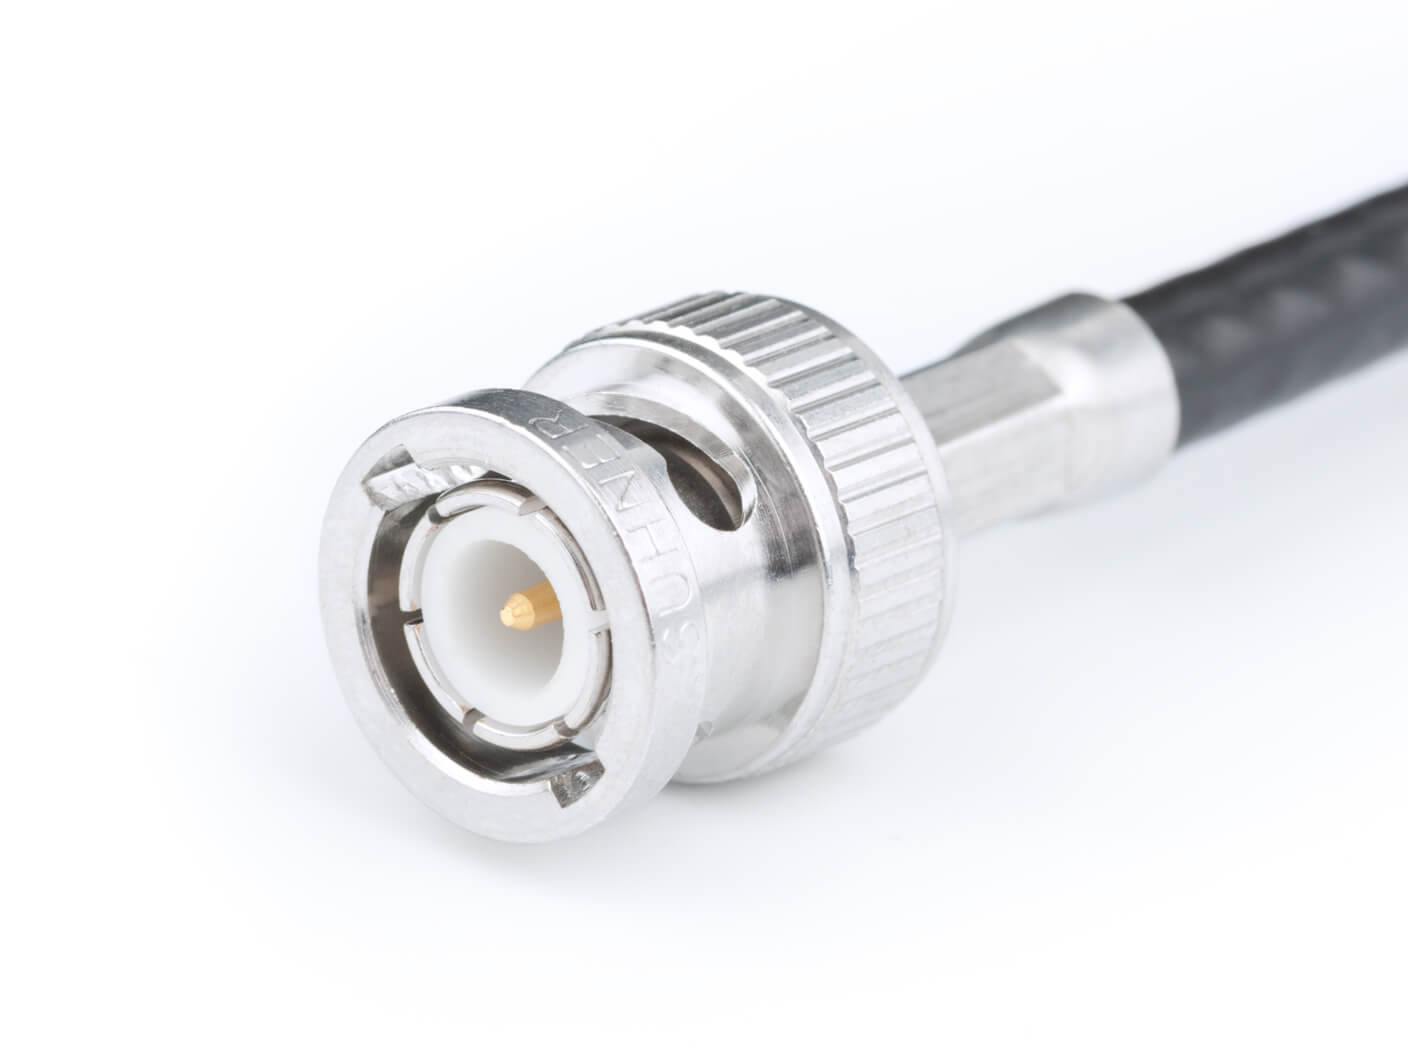
SDI cable runs can go pretty far, about 300 feet without a signal amplifier. This, combined with the twist-lock connection safety is why it’s the industry standard. HDMI cables, however, are limited to about 50 feet before you need an amplifier to get a boost for longer cable runs.
There are some other differences, such as the HDCP (high-bandwidth digital content protection) copy protection support on HDMI, lack of timecode support in HDMI, and differences in supported bandwidth and resolutions depending on the standard you are using (both HDMI and SDI have different versions that support more and more features as the versions are ratified and released).
With HDMI 2.1 finding its way into more and more products to add support for high frame rate and 6K and higher resolutions, it may end up supplanting SDI on many cameras (at least until Thunderbolt possibly replaces it, which is my prediction). HDMI is widely supported and definitely more common on more cameras, recorders, and monitors.
But in general, whether you need to output to a monitor, external recorder, or another device, both of these standards will work excellent for you. Any preference one way or the other will most likely be personal, or not even consequential.
Sensor size

You may be familiar with terms like “full frame”, “crop sensor”, or “APS-C”. These are names for various sensor sizes hailing from digital still photography cameras. The world of motion picture film sizes and cinema camera sensor sizes get infinitely more varied and can get pretty particular, but there are some easily understood sensor size classes that we can look at.
Micro Four Thirds
Many mirrorless cameras have adopted the Micro Four Thirds sensor size thanks to its smaller form factor to allow for much smaller camera body sizes. MFT sensors are around 17mm x 13mm, considerably smaller than Super35 and even APS-C sensor sizes.
This sensor does necessitate specific lenses, however you can use adapters to let you fit other lens systems onto Micro Four Thirds cameras. Including the use of these adapters, there are an absolutely huge selection of lenses available for these cameras.
Even though it’s a smaller format, modern sensors are extremely efficient and even pack some amazing low light performance–something that smaller sensors aren’t usually great at. It’s quickly becoming a very popular format for smaller filmmakers and production companies thanks to its ease of use and flexibility.
APS-C
Also known as “crop sensors”, APS-C are smaller sensors than their full-frame counterparts. APS-C sensors are 23.6mm x 15.6mm, or 22.2mm x 14.8mm in the case of many Canon cameras.
APS-C are usually a lower cost sensor compared to larger formats, and make up the majority of DSLR cameras on the market, especially in the consumer/prosumer market.
Much like MFT, there are a large amount of lenses that are compatible with APS-C cameras. They’re more affordable than the full-frame counterparts, and generally are more flexible for smaller production houses.
Super 35mm
The 35mm photography frame is not to be confused with the Super 35mm film frame size. Where 35mm photography frames are 36mm by 24mm, Super 35mm is smaller at 24.89mm by 18.66mm. It’s actually pretty much the same film, just instead of running horizontally like in a photography camera, it runs vertically in film cameras, making it a smaller dimension because the of the constraint of the smaller width in this orientation.
These days, Super35 is more of a class than an exact specific measurement. Pretty much any sensor that’s around 24-25mm wide is labeled as Super35. It’s a bit odd, as the original Super 35 frame was a taller 4-perf height that wasn’t a 16:9 or other similar ratio. Current Super35 sensors are almost al some sort of widescreen, like 16:9 or DCI ratio.
Super35 sensors are extremely popular with DSLRs and cinema cameras. The lens support is very expansive, and don’t necessitate buying higher cost full-frame lenses. You’ll find this sensor class all over the place, and often many filmmakers in the digital space have a preference for the smaller sensor size because it’s closer to original 35mm motion picture film frame sizes.
Full Frame
The full frame sensor is called such because it’s the same size as a 35mm photography negative, and as digital cameras started coming out, the sensors were smaller than a 35mm frame until larger sensors that could be the same size hit the market. Hence, full frame.
Because of the rise of DSLR video, the full frame sensor size became a popular choice if only because that’s what the flagship cameras were using. Because these were photography cameras as a primary function, the sensor size was in the photography aspect ratio of a 35mm film frame. When using a widescreen aspect ratio, the full sensor isn’t being used, as the top and bottom (think black bars) of the native frame are discarded.
Full frame sensors do require full-frame lenses, which can often be more expensive than a smaller crop sensor size, and do produce a different field of view than a crop or Super35 frame. Full frame is an undeniably huge upgrade for photography, but for cinema and filmmaking the impact isn’t quite as drastic.
Large format sensors
There are larger frame sizes, such as the various Panavision films in the 60-70mm ranges, and these are about the same size as the largest sensor cinema cameras such as the ARRI ALEXA 65, which measures 54.12mm x 25.59mm, and is generally the largest sensor size available in a digital cinema camera.
The RED Helium and Dragon sensors are about 30mm x 16mm, still less wide than a full frame sensor, but definitely larger than Super35. The RED Monstro and Weapon sensors fill the gap between full frame and the ALEXA 65 at about 41mm x 22mm.
The benefit to larger sensors is that they have undeniably better low light performance than their smaller sensor counterparts. Aside from all the bokeh and field of view advantages, the low noise and smooth image quality is part of what makes cinema camera footage stand out above even full frame and Super35 footage.
These cameras are beasts in all aspects, from capabilities to cost to required equipment, but if you need the best of the best and have the means to operate them, they can’t be beat.
Lens mount
The vast majority of cinema cameras have interchangeable lenses, allowing for one camera body to serve a multitude of needs on set. Each manufacturer typically has their own preference on how to mount lenses to their bodies, and there are even some industry standards across brands.
Thankfully, there are also adapters that will allow a camera to accept lenses from a different mount system than the one native to the camera. It may be subject to some physical compatibility requirements between the lens and sensor, but usually there is almost always an option for you.
PL mount
ARRI developed the PL mount initially for use with 16mm and 35mm cameras, and has become a very popular mount for cine lenses in the industry. PL mounts have been on 35mm cameras, 16mm cameras, the 65mm ARRI cameras, and a multitude of digital cinema cameras across multiple brands.
Because the mount is already a standard in the motion picture industry, it’s an excellent choice for multiple cameras. Some manufacturers make their cameras in different variants, allowing you to choose a native PL mount instead of an EF mount, for example, while many others work perfectly with a PL mount adapter.
Canon EF mount system
Canon’s EF mount–and its various versions–is possibly one of the most widely supported mount systems in use today. There is a huge number of lenses covering every focal range, and in many different price points.
The EF mount has become so popular that even some third-party manufacturers sell cinema cameras with an EF mount variant. There are adapters to allow EF lenses to work on other mounts as well, making the EF system extremely popular with filmmakers.
EF
The main EF mount was developed for Canon SLR film cameras, and has carried into digital, being the mount for full-frame DSLRs. The larger sensor requires the specific format of the EF mount and flange distance.
EF-S
With APS-C crop sensor DSLRs, Canon developed the EF-S mount to work with the smaller sensor size. While EF-S lenses don’t work on the standard EF mount, you can definitely use EF lenses on EF-S mount cameras, making this format extremely flexible and affordable.
EF-M
When Canon started making mirrorless cameras, the EF-M mount was born for the smaller bodies. This mount still uses an APS-C size sensor, and can accept EF and EF-S lenses with the use of an adapter.
E mount
Sony’s α (alpha) system dates back to Minolta cameras prior to Sony’s acquisition of the legendary brand, with the A-type bayonet mount, now known as the A-mount. While there are a large number of lenses and bodies that support this mount, the current iteration is the E-mount.
Sony’s E-mount started with the NEX cameras, and now can be found on the large body ICLE (interchangeable lens with E-mount), small mirrorless bodies, and cinema cameras like the FS5 and FS7. It’s a growing lens mount system and boasts some very popular lenses.
Micro Four Thirds mount
The new hotness in video and filmmaking–especially in the independent and budget space–is definitely the Micro Four Thirds system, sometimes written as MFT or M4/3. The system was developed by Olympus and Panasonic and hailed as the next evolution of photography cameras. With a smaller system, camera bodies got smaller and more compact, making them quickly adopted by photographers looking for smaller, more travel-friendly and less conspicuous cameras.
Micro Four Thirds eschews the mirror box and pentaprism of the previous DSLR-based Four Thirds system, however the sensor sizes are the same. Currently, a wide number of manufacturers make MFT camera bodies, and all brands can use any other brand’s MFT lenses, making this one of the most versatile lens lineups available.
The flexibility of the mount and system also mean that it’s extremely easy to adapt other lens mount systems with specific adapters, such as EF, PL, various Leica mounts, and the previous Four Thirds lenses.
Shutter type
When discussing the shutter types that are available in various cameras, it could get fairly technical and varied across camera types. What is really important to know here is the difference between a rolling shutter and a global shutter.

The majority of camera sensors use a rolling shutter. This is referring to how the sensor scans the image, rolling from the top to bottom, for example, one line at a time. This behavior really came to prominence when sensors switched from a CCD to a CMOS technology, but again, that’s not the important part.
Global shutter sensors don’t scan line by line, but instead take a scan of the whole sensor at once. This is how most CCD sensors worked, and are in the minority of CMOS behaviors.
What this really means for cinematography is what happens to the image. With a rolling shutter, the image can become distorted when panning quickly, especially in perpendicular pans in relation to the direction of the rolling.
For example, if you pan left and right quickly the image will become skewed or warped because the top to bottom scan pattern is technically scanning the image in a slightly different position from where the previous line was scanning.
This means that if you’re doing quick action scenes or whip-pans your footage could look unnatural. It’s not really the end of the world, you just need to be cognizant of the shortcomings and work around them.
Use of stabilizers like Steadicams and Movi rigs can definitely cut down on the wobbly footage. Not shooting certain scenes in certain ways will be another part of dealing with it.
And best of all, not all rolling shutter sensors are as bad as others. Some good quality sensors barely have a visible rolling shutter effect, so it’s definitely possible to work with rolling shutter sensors and not have your footage destroyed. It’s just one more thing you need to keep in mind when shooting.
Dynamic range
Dynamic range denotes how wide a gamut of brightness that a camera sensor can capture in one exposure. The larger the dynamic range, the more highlight and shadow details a sensor can see without losing details.
While the human eye can reliably see details inside a house as well as outside through a bright window, cameras cannot do this. You either expose for the darker portion (indoors) and blow out the window highlights, or expose for the outside and the room is vastly underexposed.
Dynamic range is measured in “stops”, the same way that exposure, aperture, and other photographic terms are measured. This isn’t necessarily standardized between manufacturers, however, independent websites and outlets often test new cameras with a standardized testing methodology across all their tests. If you’re curious, checking out various websites’ tests is not a bad idea.
With a wider dynamic range, you lose less details in highlights and shadows, reproducing a wider range of the scene and making proper exposure easier and more true to what the eye can see.
Some of the best video cameras have a larger dynamic range than others, and even within the same camera, different profiles (Natural vs LOG, for example) will offer differing dynamic range with Log usually providing the most amount of stops of dynamic range.
Log gamma

Speaking of Log format, let’s get into that. If you’ve looked at video production at all, you may have heard of Log, as it’s very popular with a lot of YouTubers and is the preferred method of professional cinematography recording. But what is it, exactly?
While the technical description is, well, highly technical, the shorter version is that Log is a shooting profile where the exposure values are defined against a logarithmic curve instead of a linear 1:1 path. What this accomplishes is an exposure where the majority of the exposure values are in the middle range of the image, the shadows are compressed upward toward that mid range, and highlights also compressed down to the midrange.

This results in an image that looks flat, gray, murky, and generally not pleasing at all. Fortunately, the fact that most of the details are crammed toward the center of the exposure curve means that you can apply a LUT (lookup table) to the footage in your editor and correct this flat image into something much more pleasing, such as the broadcast standard Rec 709 format.
While Log does allow for higher dynamic range and far more post-production flexibility, it does of course require a bit more effort in post as opposed to shooting in another profile like Natural or other more vivid and accurate profiles. If you need faster turnaround time on video, shoot in one of these presets. But if you need the extra flexibility in footage processing, go for Log.
There are different versions of Log, depending on the manufacturer. Sony has their S-Log variants, Canon has C-Log, and Panasonic uses V-Log, just as examples. These are usually the Log versions that ship with the cameras, however, if your camera doesn’t come with a Log profile, you can often install a custom Log profile, such as Technicolor’s Cinestyle for Canon cameras.
Low light performance
Most filmmaking is done on sets with lots of huge lights. Even “dark” scenes are lit way more than you’d assume. But if you’re on a budget or shooting on location in the evening or early morning, you may not have lights like you’d have on set. This means that your camera essentially needs to see in the dark, at least to an extent.
As mentioned when talking about dynamic range, cameras only have a finite amount of range that it can see. Film cinema cameras have a much larger dynamic range than most digital counterparts because film itself has a wider dynamic range than digital sensors. This means that with digital cinema cameras you’re working with a narrow slice of what your eyes see by quite a bit.
Thankfully, modern cinema cameras have better low light performance than ever, and even the DSLR and mirrorless cameras can do things that were unheard of even five years ago.
There are a few things that go into low light performance, starting with the sensitivity of the sensor. The more light that the sensor can see, the better the image in lower light. You can usually crank the sensitivity (ISO) up high enough to see in very dark situations, but there’s a drawback at a certain point, and that is noise, or what is effectively digital grain.
As you crank up your ISO, the sensor starts producing a noisier image. The noise starts creeping in through the shadows, so that will usually be the noisiest part of your image. Noise is pretty much your number one enemy in digital filmmaking, especially in low light situations.
As an example, the Sony Alpha cameras can do unreal things in low light, pretty much seeing in the dark. It’s not always usable in professional applications as it can get noisy, but the option is there. Even the new Blackmagic Pocket Cinema Camera 4K has excellent low light performance, and while the ARRI ALEXA technically has worse low light performance in overall dynamic range, it has an extremely clean image in those shadow areas.
Overall, if you’re doing proper filmmaking you won’t necessarily need the extreme low light performance, but it doesn’t hurt. If you’re shooting documentaries or low budget, low crew films, however, you’ll enjoy the benefits of great low light performance.
Battery life/power
This is an often overlooked component to a good cinema camera system, but a crucial one. All cameras require power, and if you’re shooting professionally you need as much of it as reliably as possible.
The majority of all cinema cameras have the ability to run off of a battery (or batteries). On the smaller or DSLR/mirrorless side of things, most use smaller batteries that will offer various record times, depending on the camera, camera settings, and other variables.
This means that, usually, you’ll carry around a lot of spare batteries when on shoots where you’re out and about on location, because they don’t offer usually more than an hour of record time, especially at 4K. You’ll be swapping these batteries out frequently, which may also involve breaking down your rig in order to get to the battery compartment, depending on the rig hardware and camera design.
With bigger, more professional cinema cameras you have the ability to use much larger and higher capacity batteries, such as V-mount batteries. These are quite a bit more expensive and very heavy. This is pretty much an open standard and can be used on multiple brands of cameras (perhaps with the use of an adapter) or even studio lighting for portable kits.
When the need for longer, uninterrupted shooting arises you will most likely want some sort of AC power adapter to plug into a wall outlet. Most DSLR/mirrorless cameras have such an adapter available as an accessory, as do professional cinema cameras. Newer cameras with USB Type-C ports even can allow for charging via this port, and hopefully we see more cameras with the Type-C for both power and data transfer.
Storage methods
Cameras need to store the footage somewhere, and depending on the camera and file format, that storage device may vary, so let’s take a look at the various cinema camera storage devices that you may run into.
SD cards
The majority of consumer cameras these days store photos and videos on SD cards. SD cards are inexpensive and widely available. They not only come in different sizes, but also different read and write speeds, broken into three different speed classes.
The first class is Speed Class, with ratings of 2, 4, 6, and 10. These will get you up to 10 megabytes a second writing speed, and each class designation is indicative of the MB/sec rating. These are the most inexpensive cards and will work for 1080p low bandwidth video codecs.
Next is UHS Speed Class, rated at U1 and U3. These are 10MB/sec and 30MB/sec respectively, and can be used for up to 4K UHD recording, including up to 120 fps. These are the most common fast cards that you’ll see in stores.
Finally, there’s the Video Speed Class cards, again with rating classes indicative of their speed in MB/sec (V6, V10, V30, V60, and V90). Video Speed Class cards can record up to 8K with the higher bandwidths, and are best if you’re shooting in a high bandwidth codec.
Not all brands/cards are capable of reaching the advertised sequential write speeds as advertised, and due to not wanting to lose precious data, you’ll want to stick with reputable brands such as Sandisk, Kingston, Lexar, and the like. Personally, I have never had a Sandisk or Kingston card fail across different card formats.
CFast cards
Back in the day, the “professional” photography cameras used CF (CompactFlash) cards. They were more expensive than SD cards and definitely larger, and thus eventually fell out of favor with camera manufacturers. The cards are also slower due to the standard being built on Parallel ATA interfaces (also known as PATA, formerly known as IDE).
CFast was the next iteration, and thanks to its Serial ATA (SATA) interface, you can get a lot of data onto the cards very quickly, with speeds of up to 600MB/sec with the SATA III-based CFast 2.0 cards. This has made CFast cards popular with digital cinema camera manufacturers for high quality and high-bandwidth codec support.
There is also a CFexpress card that is built on PCI Express for even faster speeds, up to 2GB/sec. Not many cameras support this XQD form-factor card at this point, but Nikon has begun to roll this out across its line, including the new Z6 and Z7 cameras, and even Phase One is building in support in their IQ4 system.
CFast cards and their various versions are definitely more expensive than SD cards, but are crucial when shooting high bit rate footage. If you’re shooting with a higher end camera, there’s a good chance that you’ll be using these in your workflow.
SSDs
With USB 3.0 and Type-C becoming a more widely adopted interface on cameras, the ability to use consumer-grade SSDs has quickly become a reality for high speed, high capacity video storage.
With even a standard consumer drive such as the Samsung T5 (Amazon | B&H Photo) and Angelbird SSD2GO PKT XT series (Amazon | B&H Photo), you can have terabytes of storage space that’s fast enough to handle most codecs at a very affordable cost per GB.
You still need to make sure that the drive is using USB 3 or higher and supports the sustained sequential write speeds necessary to handle the codec without dropping frames, but it’s definitely a very popular method of saving footage from the growing number of cameras that support this method.
Hard drives, SxS, REDMAGs, and more
When you get to the upper echelon of cinema cameras, you start to see some more unique and proprietary storage methods. And these are usually higher capacity, higher speeds, and much higher price tags.
Several cinema cameras can use specialized hard drives to save the footage, and these are usually smaller custom proprietary formats for that brand’s cameras. They’re larger than memory cards, but usually offer high capacities.
Sony’s SxS format is a PCMCIA-based ExpressCard device and offers around 1.5GB/sec write speeds. SxS cards are professional grade in all manners, and the price reflects it, but you can use these in a variety of high end cameras.
RED cameras use their proprietary REDMAG SSDs. These are almost prohibitively expensive, and max out at just under 1TB at 300MB/sec, depending on the camera and its supported speeds. Unfortunately, RED cameras don’t support other methods of storage so you’ll need to load up on REDMAGs if the RED is your camera of choice.
Internal recording vs external recording
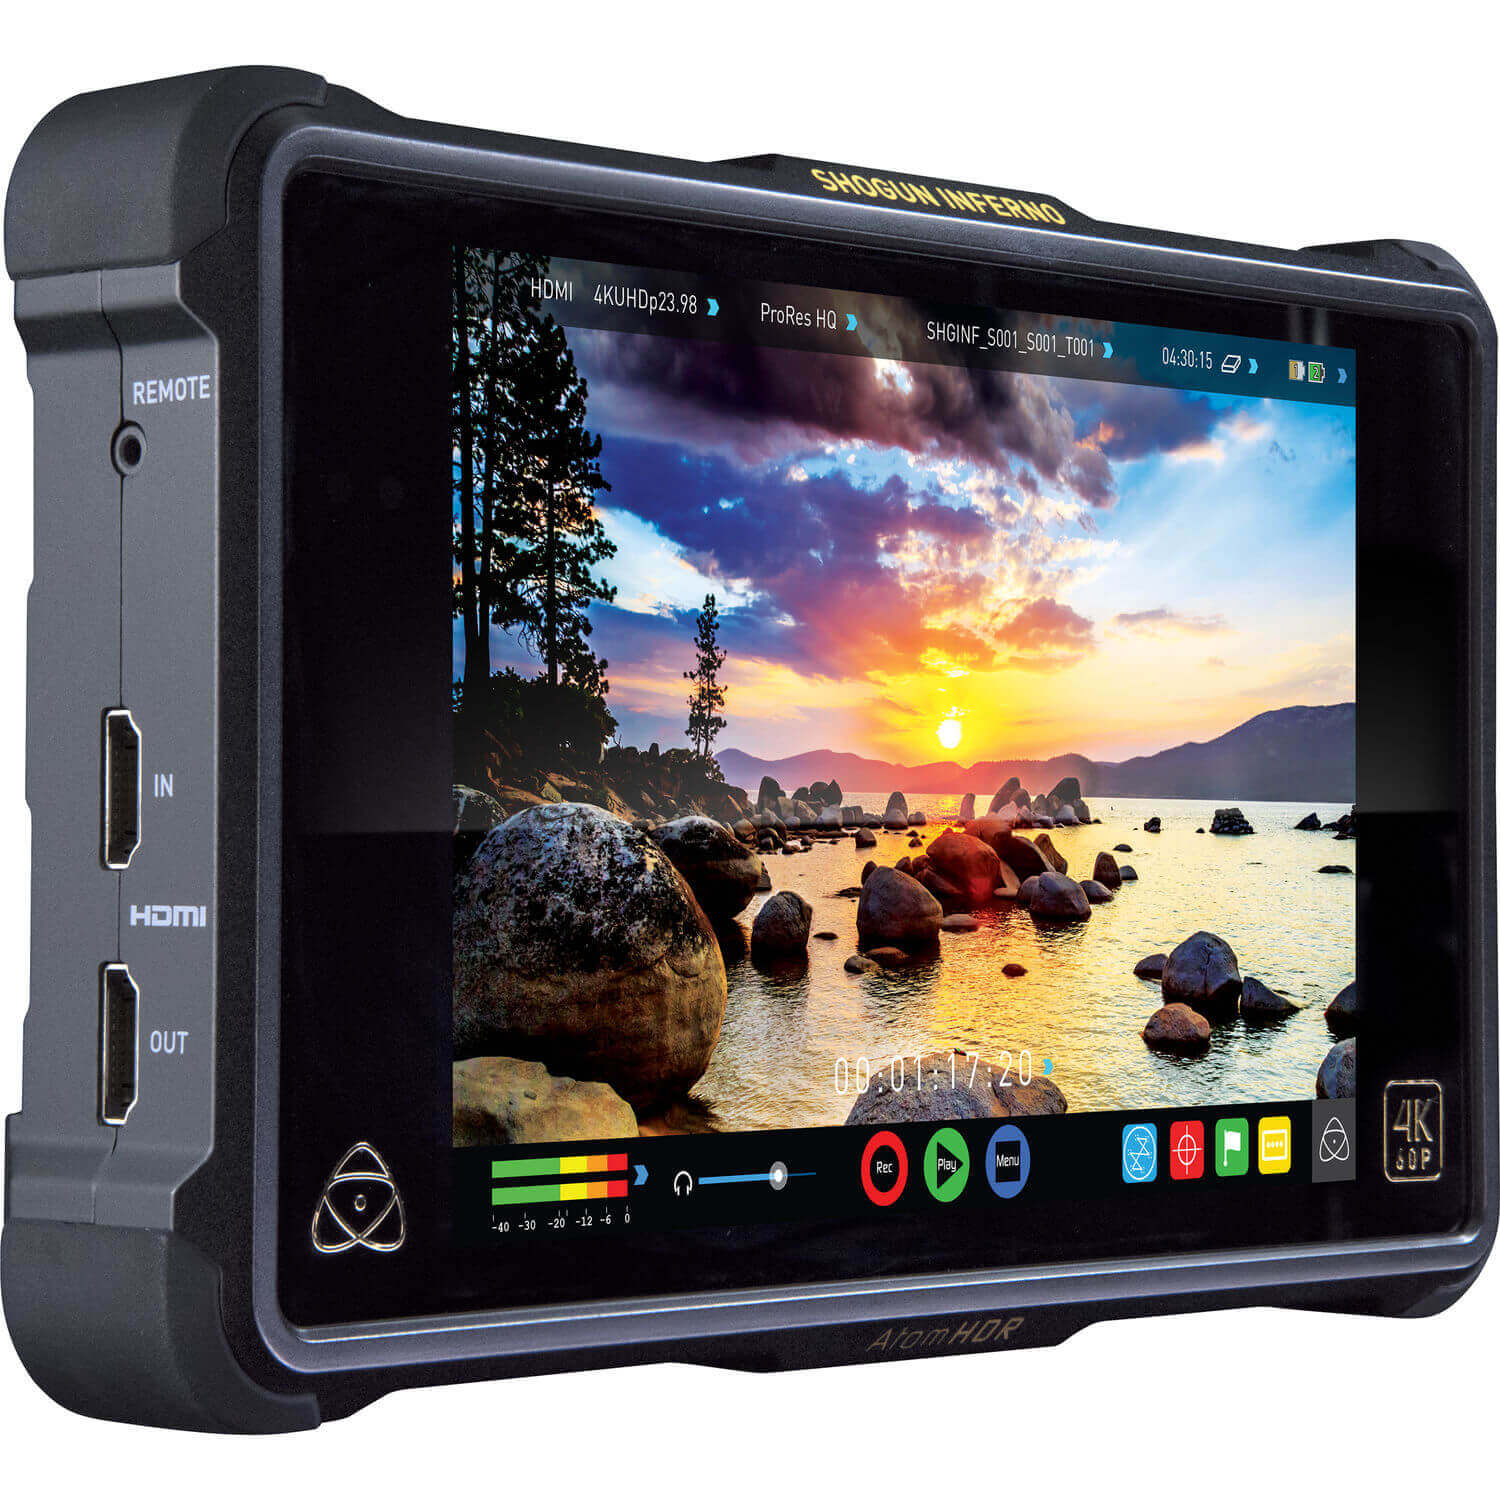
All of the methods and storage devices above are what’s referred to as internal recording, meaning that the recording is occurring within the camera itself and not on a device that is apart from the camera. But there is another method of saving footage, and that is external recording.
The main difference between internal recording and external recording is that you’re not saving to a memory card or other storage medium directly from an interface that is built into the camera. This is usually done by the camera outputting a video signal over either HDMI or SDI and an external recording device is capturing that signal and saving a file as it reads the incoming signal.
Usually, these recorders take the form of what appears to just be an external monitor, but also has recording capabilities. You mount these on your camera rig (or somewhere), and you can use it for getting better focus and color on a larger display than on the camera, plus the external recording capabilities.
The Atomos (Amazon | B&H Photo) recorders are some of the most popular and widely used units, and are most peoples’ introductions to external recording monitors. They offer multiple inputs, outputs, great display, and rock solid recording capabilities at fairly affordable prices.
There are some fairly substantial reasons as to why you may want to record externally, starting with longer record times. External recorders typically offer more storage space than most cards, making them beneficial for longer shoots, especially with camera rigs that may make the memory card door not accessible when in a cage.
Most external recorders like the Atomos units also offer a high quality external monitor in addition to recording capacities, and you’ve got yourself a very useful piece of equipment. You can even preload LUTs into your device to see what the footage will look like with a preset color grade applied, taking some of the guessing game out of getting the shot right in camera.
In addition to longer recording times and an external monitor, the next major reason to use an external recorder is to record in a different codec than what the camera itself supports along with a higher bit depth than what the camera can save natively.
Where most cameras save in their own variant of the x264/x265 codec at a bit depth of 4:2:0, some cameras offer much better 4:2:2 output via the HDMI output, and connecting this to the external recorder will allow you to get that higher quality footage in a better codec, like ProRes or even Raw format.
Even if you can’t make use of the 4:2:2 footage or don’t need ProRes, you can also use an external recorder as a backup recording method–or using the internal recording as a backup to the external footage. Either way, redundancy can be a life saver when you’re working professionally, so definitely a good option to have.
Realistically, if you’re shooting professionally and need high quality footage for serious color grading, you’re very likely to be using an external recorder. They’re extremely invaluable for any kind of shoot and are worth looking in to.
Stabilization
One thing you won’t see on most pro cinema cameras is some form of in-body image stabilization. You may think this is a bit odd, coming from DSLRs and mirrorless cameras, but there’s a very good reason for it.
Cinema cameras don’t have stabilization features built in because they reduce the amount of control that filmmakers have over their shot. In-body image stabilization (IBIS) or in-lens stabilization actually accomplish their goals by creating a drift in the sensor or lens to counter the natural hand-held drift of the camera body.
This drift does impact the footage, and while it’s fine for non-professional YouTube, vlogging, or non-commercial projects, it would be readily apparent in cinematic projects. Because most cinema cameras are on full rigs, either tripods, huge cage kits, or professional gimbals or Steadicam mounts, having the camera taking a stab at the stabilization is counterproductive and often actually fights other forms of physical stabilization.
A perfect example of this is the GH5 and GH5s. The GH5 is more of a photography and video camera, and as such, offers stabilization. The GH5s, however, is geared more towards cinematography and removes the IBIS along with a few other cinema-minded changes.
With the amount of rigging and other gear that cinema cameras are usually on, you won’t need stabilization, so don’t get hung up on looking for a cinema camera that has this feature.
Our favorite cinema cameras (and cinema camera-adjacent cameras)
Now that we’ve gone over the more important things to know about what makes a great cinema camera and things you should be looking for and expecting, let’s finally look at the cameras.
We’ve put together a list of some of our favorite cinema cameras available today, along with some that are technically not cinema cameras but can definitely get the job done.
While not all of these are affordable to everyone, some definitely merit being included because of their stature in the industry. And on the other side of things, some are included because they can’t be overlooked as true budget cameras that make excellent first cameras for growing filmmakers.
So with that said, let’s get into this, starting with…
Blackmagic Pocket Cinema Camera 4K
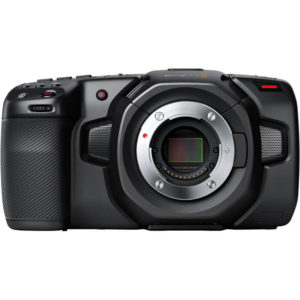
We won’t mince words about it, the Blackmagic Pocket Cinema Camera 4K (or BMPCC4K) is probably our very favorite cinema camera available right now, and for good reason. The image quality from its Four Thirds size sensor is impeccable, the I/O and connectors are well though out, supports the Micro Four Thirds lens mount for a huge amount of MFT lenses (and others with adapters), the menu system is dead simple, and has an MSRP of only $1,299.
You read that right. This is a highly competitive professional grade cinema camera that retails for $1,299, and shoots 4K 60fps or 1080p 120fps. Yes, you’ll need to buy a lens or three if you don’t have any MFT lenses or adapters for systems like EF or PL lenses.
But all in all, this is probably the best 4K video camera you can get for the money, hands down. In addition to being one of the best 4K cinema video cameras, it’s also truly one of the cheapest 4K cameras for filmmaking.
While it’s definitely the most budget friendly out of the box, you will need to add on to the camera, so keep this in mind. You’d likely want extra batteries, possibly an external SSD like the Samsung T5 (Amazon | B&H Photo) and Angelbird SSD2GO PKT XT drives (Amazon | B&H Photo), as well as some sort of cage and/or rail mount system to really get the best usability out of it, but still, the body itself is only $1,299.
Why is this a big deal? You won’t find this quality and usability at anywhere near this price point anywhere else. The BMPCC4K not only offers stunning footage quality, but offers many of the professional features that cameras five, ten, or maybe even twenty times the cost can offer. No, it’s not the best camera in the world and there are reasons why most cameras are more costly than the BMPCC4K, but even that said, the value is mind-blowing.
You can look forward to having all the filmmaking tools you’d want, such as zebra stripes, false color, and displaying footage with LUTs just to name a few. There are mini-XLR audio inputs for high-end microphone connectivity directly to the camera, as well as a Type-C connector for either power or SSD connectivity.
Best of all, with the latest update, there is now support for Blackmagic Raw, offering up to 12:1 compression with outstanding visual quality. You have the ability to save in multiple codecs if BMR isn’t your thing, including multiple ProRes and even ProRes Raw, and can shoot in 10-bit 4:2:2 or even 12-bit Raw.
This Blackmagic Raw support is one of the huge benefits to the camera, especially as the BMPCC4K is one of the small handful of cameras that are certified for Netflix production. If you’re shooting content specifically for the streaming platform, they have strict technical requirements, and the BMPCC4K is easily the most affordable camera to make the list, earning it some huge points with filmmakers.
Yes, there are some downsides, as there have been issues with cameras crashing or failing permanently early on, but this appears to have been smoothed out. Availability has been pretty much non-existent since release due to demand outpacing supply, and it’s only just now that orders are getting shipped out within a few months of placement, but this should start getting better soon.
Unlike many cameras in this price range, there is no continuous autofocus when shooting. While this is definitely a letdown for vloggers, this isn’t a vlogging camera and doesn’t offer autofocus just like any other cinema camera on the market.
Another vlogger-centric feature that people have been clamoring for in this camera is a flip-out display. While the 5″ touch screen monitor on the BMPCC4K is really great, it’s difficult to use when rigged out in a cage, or with battery packs, or slung low or in another difficult to view position. Yes, you can use an external monitor, but since most of the controls are on the touch screen, it does take a bit of fuss to use if you don’t kit it out with this in mind.
And let’s talk battery life. The battery life off of the single Canon LP-E6 is pretty horrendous, but it does come with a DC power adapter, and a battery grip announced that uses Sony L-series batteries was announced April 2019 for release in the following August, allowing for up to two hours of shooting. Thankfully, you can use USB battery banks, or even better, V-mount battery packs for massive amounts of power. While it’s not the best out of the box, the capabilities can be bolted on.
Blackmagic Design also now owns and develops DaVinci Resolve, their post-production suite, and they include a full Studio license with the BMPCC4K. Resolve has been rapidly growing in popularity as more features are included, largely in part to the fact that there is a rather full-featured free version and the Studio version is now a mere $300 to purchase.
Resolve includes editing, color grading, full audio mixing, delivery components, and with the latest updates, visual effects and compositing, making Resolve a full, one-stop shop for post-production.
While it is a bit different from Premiere Pro and Final Cut, it’s not a huge learning curve, and even offers to set up shortcuts to emulate those other apps. We absolutely love DaVinci Resolve for its power and flexibility, as well as being the best free alternative to Premiere Pro available. The addition of Fusion for visual effects and upgrades to the Fairlight audio module along with constant improvement of the Edit module make this an extremely valuable application
In reality, we could go on and on about the Blackmagic Pocket Cinema Camera 4K, but the full feature coverage would take way too long. We’ll wrap this up by saying that if you’re looking for an inexpensive cinema camera, your first cinema camera, or a great B camera (especially to match with a Blackmagic URSA series camera), the BMPCC4K is an insanely great value, even with the drawbacks of the camera. The Blackmagic Pocket Cinema Camera 4K is, in our eyes, the best camera for filmmaking on a budget.
Check the lowest price on: Amazon | B&H Photo
Panasonic LUMIX GH5s
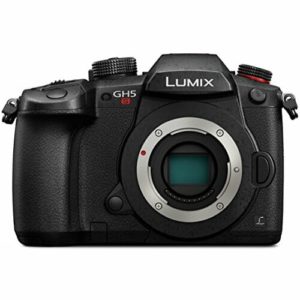
The GH5s inherits the vlogger/indie filmmaker legacy of the GH5, GH4, and GH3 before it. Panasonic’s YouTuber-favorite camera is continuing the tradition of excellence in the Micro Four Thirds line of cameras, but with a few tweaks from the GH5 that shipped less than a year before the GH5s was released.
The GH5s is capable of shooting up to 4K 60fps depending on the codec and bitrate choices (including DCI 4K), but no 120fps at 1080p. You do get up to 10-bit 4:2:2 recording internally and externally, putting it at one of the more affordable cameras with this feature that also offer a flip out screen and pretty great autofocus.
The battery life is pretty great and also supports external power, and the menu system is user-friendly. The aforementioned autofocus is much better than the GH4, but still falls behind the Canon dual pixel autofocus and Sony’s new autofocus system, but definitely gets the job done.
So, then what about the differences between the GH5s and GH5? Well, starting with the autofocus, it’s a bit slower than the GH5, but the GH5s is better in low light. The GH5s sensor is half the size at 10.2MP compared to the GH5 20MP sensor, but this means larger pixels and better low light performance, including much better dual native ISO capabilities.
V-Log, Panasonic’s gamma profile, ships by default with the GH5s, but costs an additional $100 to download to install on the GH5. Along the lines of cinematography-specific changes, the GH5s doesn’t have in-body stabilization (IBIS), and instead can only use lenses with stabilization, and the body also supports timecode in/out via the flash sync port.
Speaking of V-Log, the GH5s also supports HLG, or Hybrid Log Gamma. HLG is a format created by England’s BBC and Japan’s NHK, two broadcast giants. The format was designed to allow for “instant HDR”. Basically, it allows for a wide dynamic range, as well as translation to non-HDR displays with accurate translations from HDR to SDR. HLG is a very flexible profile and offers quite a few benefits to HDR workflows, and the GH5s is one of the few cameras currently that support it.
Lastly, the GH5s variable frame rate (VFR) mode gets you up to 240fps, where the GH5 is capped at 180fps, and is roughly about $500 more than the GH5, and doesn’t retail with kit lens bundles.
No, the GH5s isn’t a “true” cinema camera, but with the improvements in this new variant it gets much closer. There are plenty of filmmakers running GH5 and GH5s productions, however, and the flexibility of the camera is why it is so popular an option for YouTubers, individual filmmakers, and others wanting a small camera with great visual quality.
Check the lowest price on: Amazon | B&H Photo
Sony A7III
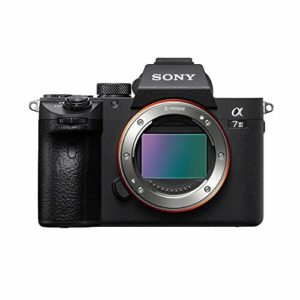
Sony’s Alpha series of mirrorless interchangeable lens cameras have been strong contenders to Canon’s DSLRs in the video world for a good while now, and the A7III keeps improving upon the previous iterations and winning over independent filmmakers with their features and power.
The A7III sports a 24MP full frame sensor capable of 4K 24fps oversampled from a 6K frame. While there are no fancy codecs like Raw or ProRes, you’ll get your choice of either XAVC S or AVCHD formats of MPEG-4 AVC/H.264 options up to 100MB/sec bitrates.
In 4K you’ll get up to 30fps, albeit oversampled from a cropped in 5K frame instead of the 6K frame at 24fps, and 1080p shooters get up to 120p. You do also get S-Log II and S-Log II, as well as HLG and several other profiles. While internal recording is limited to 8-bit 4:2:0 color, external recording will get you 8-bit 4:2:2 color. Still not as powerful as 10-bit, but definitely a large step up.
Speaking of internal recording, the A7III does come with a dual card slot. Slot 1 supports UHS-I/II SD cards, while the second is a multi-card slot supporting Memory Stick Duo as well as SD, but only up to UHS-I speeds. Either way, dual card support can be invaluable when shooting mission-critical footage that you can’t risk losing if a card fails.
The A7III sports many of the cinematography features you’d expect, such as zebras, peaking, focus magnifier, grids, and others. Unfortunately, they’re on a screen that tilts, but doesn’t flip out.
But, unlike most cinema cameras, however, the autofocus on the A7III not only exists, but is extremely good–almost as good as Canon’s dual pixel autofocus. That, along with excellent codec support, in-body stabilization, and amazing low light performance make the A7III an excellent cinema camera for single operators, YouTubers, and more.
Check the lowest price on: Amazon | B&H Photo
Sony FS7 II
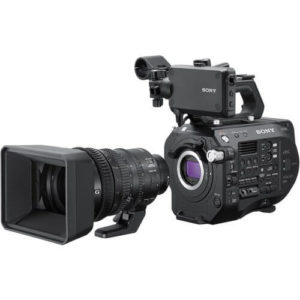
Sony has a wide range of digital cine cameras, one of the most popular being the FS7, and its successor, the FS7 II. This camera is a fully contained shoulder mount 4K Super 35mm full frame E-mount camera system, and is a very popular option for a multitude of filmmakers as one of the best professional video cameras available.
The FS7 II is, of course, Netflix certified, and supports the usual DCI 4K 60fps, but at a whopping 600MB/sec in XAVC-I recording mode, same with 1080p, but with a variable frame rate mode you can get up to 180fps in 1080p. Raw, ProRes 422 and ProRess 422 HQ are supported with the extension unit, offering post production flexibility with 10-bit color.
In addition to the excellent visual quality, you’ll get all of the other niceties that cine cameras offer, such as peaking, zebras, support for V-mount batteries, and external Raw recording capabilities.
One of the benefits of this camera is that it does come with a grip and control arm, allowing you to either hold it shoulder mounted, or against your chest, and still control all of your key functions without taking your hands off of the support point. With most cinema cameras you will need to add a cage or other rig in order to stabilize the camera, making this a great option for a full kit.
You’ll also get a built-in ND filter, allowing you to shoot outdoors in the daylight and still maintain shutter speed and aperture. Usually, an ND (neutral density) filter is a piece of glass that you put in front of the lens, but with some cameras they are built in to the camera body, meaning you’ll never be without it.
As far as I/O, there’s an XLR mic input with phantom power, SDI output, headphone out, DC input, HDMI output, and a few more. The storage media is the XQD CFexpress cards that can support the full 600MB/sec bandwidth this camera can generate, and sports two of these slots. There is also an SD card slot for saving configuration data.
There’s honestly a lot to like about the FS7 II, and is well established as a very popular camera. Despite needing an external add-on for ProRes and Raw support, the camera still offers a ton of power and flexibility thanks to its massive bitrate bandwidth. It’s a great (mostly) self-contained cinema camera that can do pretty much everything.
Check the lowest price on: Amazon | B&H Photo
Sony FS5 II
The Sony FS5 II is the little brother to the FS7 II, and actually is quite a bit different functionally. The common description of the FS5 is “an excellent 1080p camera, an okay 4K camera”, but is an excellent full HD run-and-gun camera.
Where the FS7 is a shoulder-mount design, the FS5 is more of a grab and go handheld system. You don’t necessarily need to add a ton to the camera to make it viable for a single camera operator, and is an excellent travel-friendly rig. While the camera does great with portability, power and features are definitely sacrificed in this model.
While 1080p footage can be saved in 10-bit 4:2:2 color, it’s only at a 50MB/s bitrate. Want 4K? It will come at a cost–8-bit 4:2:0 only at a mere 100MB/s bitrate. Also, you don’t get ProRes or HD422 codecs (note, the FS5 II does allow for ProRes Raw output to an external recorder), instead leaving you with XAVC-L. And there’s no slow motion in 4K either. But the footage does look good for its limitations. Again: an okay 4K camera.
Back to 1080p, it’s an excellent option for both filmmakers and YouTubers, as there’s log formats for post processing, Cinegamma settings for great colors out of the box if grading isn’t your thing, and you do have a multitude of slow motion frame rate options.
The FS5 sits in a weird spot in the cinema camera world these days. The A7III is cheaper and at least as good footage, but needs more gear to make it complete. The FS7 is undoubtedly the better camera, but at a much larger size and weight. But if you need a super solid 1080p camera that can shoot 4K if you need to while maintaining a travel/run-and-gun friendly body, you may find that the FS5 is your go-to camera.
Check the lowest price on: Amazon | B&H Photo
Canon M50
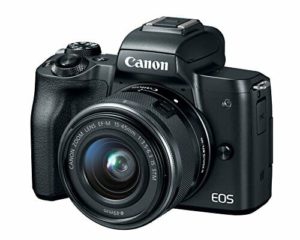
Wait, the M50? You may be thinking to yourself “I thought this was about cinema cameras.” And while, yes, the majority of these cameras here are actual cinema cameras, but that doesn’t mean that you can’t shoot excellent footage on less expensive cameras.
We’ve previously lauded the praises of the M50 as not just one of the best cameras for live streaming but also as an excellent vlogging camera. But its actually a really capable cinema camera, especially if you’re on a budget. The M50 is is a really flexible camera with amazing 1080p footage and features.
The M50 does offer a flip out screen, decent battery life and support for EF-M lenses (and EF/EF-S with an adapter), and blazing fast dual-pixel autofocus. Unfortunately, that autofocus doesn’t engage in any mode other than 1080p, and while there is 60fps in 1080p, you need to drop down to 720p to get 120fps.
The main drawback as a cinema camera is the lack of C-Log. You can install third-party solutions, such as the EOSHD Picture Profiles, or Magic Lantern. The camera does have a bit lower bitrates, offering 120MB/s at 4K and 60MB/s in 1080p.
So, no, this isn’t really a cinema camera. But, as a first camera, travel camera, or budget filmmaking camera it’s definitely a good option to keep in mind.
Check the lowest price on: Amazon | B&H Photo
Canon C300 Mark II
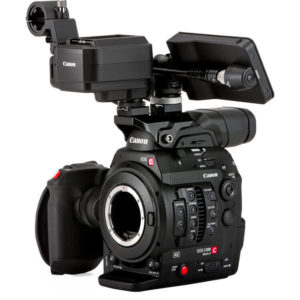
And then we have the Canon C300 Mark II, on the complete opposite end of the spectrum from the M50. The C300 mkII is a full-blown cinema camera with pretty much every option you may need as a filmmaker, and at a fairly reasonable price point, solidifying it as one of the most popular Canon cinema cameras on the market.
The C300 mkII is a Super 35mm sensor camera that can shoot DCI 4K and UHD 4K up to 30fps at 10-bit 4:2:2 internally, and 2K or 1080p up to 60fps at 10- or 12-bit 4:4:4 internal. Both of these are intraframe modes, and offer as high as 410MB/s bitrates and do require writing to CFast cards. You do get smaller bitrate Long GOP formats as well, and while these can save to SD cards, you won’t get the high bandwidth modes unless you write to CFast.
Thankfully, you do get dual CFast cards, external Raw capability (including internal 4K and external Raw simultaneously), an internal ND filter with up to 10 stops of reduction, and Canon Log Gamma 2. You also do get built-in profiles for matching other cameras, BT.2020 support and DCI-P3 color space support.
And don’t forget Canon’s awesome dual pixel autofocus, an excellent addition for filmmakers who work in the documentary industry–Canon cinema cameras are some of the most commonly found bodies in this field thanks to the full feature set of the cameras.
Two XLR mic inputs are available, a great monitor and grip are included in some kits, and you have basically everything you need in order to shoot cinematic footage, documentaries in run-and-gun situations, or even YouTube videos (albeit this might be overkill according to some people).
Much like most of Canon’s cine cameras, the C300 mkII is available in either an EF-mount body or PL-mount variant, suiting a wide variety of users and situations. What you won’t get, however, is internal Raw or ProRes.
For that, you’ll need to output to something like an Atomos Shogun Inferno or other external recorder that supports these formats. But the internal XF-XAVC Intra formats definitely have enough bitrate and bit depth to handle shooting if you don’t need ProRes or Raw.
The big (and I mean BIG) brother to the C300, the full frame Canon C700, does offer ProRes internal recording to CFast at up to 72fps. With the optional Codex Digital Recorder you gain Raw up to 60fps at full frame, or Super35 crop up to 72fps and 2K/HD up to 168fps. That, along with HLG/HDR capabilities are the main features you’re missing out on with the C300 mkII, but the C700 comes in at three times the cost.
Canon cinema cameras are extremely popular across the board, and the C300 mkII packs a huge amount of punch in a reasonably priced kit. It’s flexible enough to handle anything you’d throw at it, either minimally kitted out or fully rigged for a production set. The sheer richness of features in a compact, well thought out body with excellent image quality have easily set the C300 mkII up as a go-to camera for professional applications.
Check the lowest price on: Amazon | B&H Photo
Canon C200
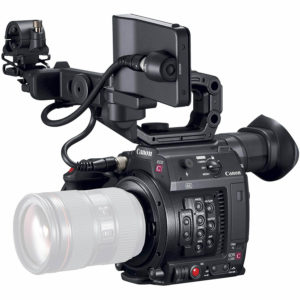
The C200 is technically the little brother to the C300 mkII, but in some ways is a better option. Where the C300 mkII doesn’t offer Raw or ProRes internally the C200 does, offering up the excellent Canon Raw Light codec in up to 12-bit DCI 4K at 60fps with an insane bitrate of 1Gb/s to CFast cards. And it’s less than the C300 mkII.
You still have MP4 recording for 4K and 1080p at 4:2:0 8-bit quality, and while it’s not DCI 4K, the UHD 4K in this mode does support up to 60 fps at 150MB/s and 1080p up to 120 fps at 35MB/s.
What this really amounts to is that you’ve got two extremes: Insane quality Raw footage or 8-bit 4:2:0 footage that you can’t push nearly as hard in post. There’s no middle ground internally such as ProRes or even the XF-XAVC format found on the C300 mkII for some middle ground balance between size and quality.
The C200 does also come with a kit with a run-and-gun top handle, which the C300 mkII does not include–the C300 kits offer a camcorder style hand grip. But you still get the dual XLR mic inputs, SDI and HDMI output, individual 3.5mm mic inputs and headphone outputs, and the same ND filter built in to the body.
It’s a bit of a tough choice between the C200 and C300 mkII, but depending on your needs, one will end up on top. If you need quick turnaround, do a lot of broadcast TV gigs and don’t shoot Raw, the C300 mkII will be your choice. But if you need Raw internally, 4K 60fps footage, and want to save a few bucks, the C200 is an excellent choice.
Check the lowest price on: Amazon | B&H Photo
Canon C100 Mark II
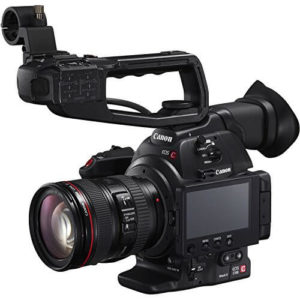
And that leaves us with the C100 mkII. Yes, we’re looking at several Canon cine cameras here, but they do all have some rather distinct features that make the different models quite, well, different.
The C100 mkII doesn’t do 4K. It doesn’t do Raw, ProRes, or anything fancy. It doesn’t do SDI output. It doesn’t do CFast. It doesn’t do high bitrate, and it doesn’t do anything higher than 4:2:0 internally. I know that sounds like a lot of negatives, but what it does do, it does brilliantly.
You get 1080p 60fps footage in either AVCHD at 28MB/s or MP4 at 35MB/s. You still get two SDXC card slots, two XLR inputs, and an uncompressed HDMI output that does support 4:2:2 for recording to an external recorder that can support ProRes or another comparable codec.
It’s still a Super 35mm sensor, has decent low light sensitivity, and does support Canon Log Gamma and Wide DR Gamma. And you still get the insanely useful ND filters with the same stops of reduction as the bigger siblings in the series.
What the C100 mkII really turns out to be is a super clean 1080p camera for those who don’t need to push footage super hard in post. Perfect for YouTubers, small documentary crews or a B- or C-cam shooting along side the C200 or C300 mkII.
It’s an affordable high quality 1080p camera that is much more affordable than even the C200, and is great for documentary filmmakers, independent filmmakers, or event shooters.
Check the lowest price on: Amazon | B&H Photo
Blackmagic URSA Mini Pro 4.6K G2
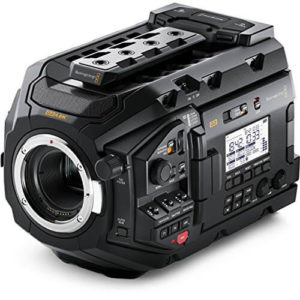
As of March 2019, Blackmagic Design has announced the release of the URSA Mini Pro 4.6K G2. G2 meaning, of course, as the second generation of the immensely popular URSA Mini Pro 4.6K. And this version brings some much-needed upgrades to the camera, especially following implementation of some of these features in the BMPCC4K.
The URSA Mini Pro 4.6K G2 is another Super 35mm sensor size camera, and is laid out like a broadcast camera, but handles like a cinema camera, especially after the new features in the G2, primarily with the support of the insanely good Blackmagic Raw format natively in the URSA Mini Pro 4.6K G2 in both film and extended video modes.
You do get a full 4.6K image out of the sensor at 120fps, but also windowed 4K DCI up to 150fps and windowed 1080p at a ridiculous 300fps. The fact that you can get these frame rates along with Raw, along with 15 stops of dynamic range is pretty unheard of.
Some of the other updates are the addition of a USB Type-C port, just like the BMPCC4K and general updates to the sensor itself. And in front of that sensor you’ll find the same type of built-in ND filters as the Canon C-series, offering up to 10 stops of ND reduction.
Unlike the BMPCC4K, however, the URSA Mini Pro 4.6K G2 ships with an EF mount for Canon lenses. You can purchase other mounts for PL, F mount, and others, offering flexibility for any sort of workflow you may find yourself in.
There are two CFast slots and two SD slots, offering a multitude of storage options and configurations. And with the aforementioned USB Type-C port, you can also save directly to an external SSD, just like with the BMPCC4K.
In addition to the newly implemented Blackmagic Raw format, you can save ProRes internally to either the CFast or SD cards, although the latter will need UHS-II class cards. This includes up to ProRes 444 which is exactly what it sounds like: support for full 4:4:4 bit depth, as well as 4:2:2 subsampling and other various versions of ProRes.
You do have multiple power options as well, with the included power supply, included battery, and we’re assuming, using a power pack with the Type-C port, although we haven’t found any information on that yet.
And of course, being a Blackmagic Design camera, it does ship with a full copy of DaVinci Resolve Studio, which could effectively be a $300 discount off of the price of the camera if you were planning on buying DaVinci Resolve Studio anyway.
Really, we love what Blackmagic Design has been doing for the cinematography and videography industry over the past several years, and the URSA Mini Pro 4.6K G2 continues that tradition. It’s an absolutely solid and powerful camera for a very reasonable price, and shouldn’t be overlooked if you need sheer power and flexibility.
Check the lowest price on: Amazon | B&H Photo
Fujifilm X-T3
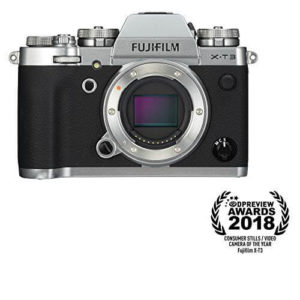
And now for something completely different. Fujifilm has some amazing compact photography cameras in their X line, winning fans with their small size, excellent image quality, and stunning film emulations along with classic build styles. The X-T3 is the first of these that actually excels as a video and cinema camera.
The X-T3 is a small body mirrorless with a Super 35mm sensor, but packs a ton of features into a very affordable body. You get internal DCI 4K 60fps recording at 4:2:0 10-bit color, and 4:2:2 10-bit through the HDMI output. 1080p can shoot up to 120fps, and you have your choice of H.264 and H.265 codecs in either All Intra or Long-GOP, with DCI 4K maxing out at 400MB/s.
You’ll get F-Log gamma included if you want full control over your image, as well as several excellent built-in film simulations for great visuals out of the camera. If you’re using native X-Mount lenses (of which there are many great ones) you’ll get some great autofocus, but no in-body stabilization.
The one down side to this camera, in our opinion, is one that is really applicable to the target demographic of this camera, which is YouTubers, vloggers, and single-person crews, and that’s the lack of a fully articulated flip out display. The screen is similar to some of the Sony displays where it pivots and tilts, but not a true flip up or out.
Other than that, this is an excellent affordable cinema camera that’s off the beaten path, but is an overall very flexible and powerful camera. It may take a bit to kit out to get to a full cinema camera rig, but for small filmmakers who value image and codec quality, this is an amazing choice.
Check the lowest price on: Amazon | B&H Photo
RED cinema cameras
RED cameras are a bit of a mythical set of equipment, often eliciting wild lust from other filmmakers aspiring to reach the place in their career where they can shoot with one, and with great reason. The image quality out of the RED camera line is insanely good, and the quality it offers at the price–while still expensive–is opening doors for independent filmmakers more and more.
But if you’ve paid even a little bit of attention to RED cameras since the RED One 4K launched in 2007, you might be overwhelmed with the sheer number of oddly named cameras and sensors that have been released. Thankfully this has since become streamlined and is easier to figure out.
RED DSMC2 camera body
For the main RED cameras, they all revolve around one single camera body these days. Also referred to as a “brain”, this is the RED DSMC2. Formerly referred to as the Weapon, the DSMC2 body is what has all your I/O and controls the majority of the camera’s functions.
The DSMC2 is the result of RED’s recent efforts to unify the camera lines. Instead of using different bodies across different camera releases, now everything is built around the DSMC2. You buy the body with the specific sensor of your choice, but the body always stays the same. It’s much easier to know exactly what camera is what after this change, and we’ll discuss both the sensors and other bodies momentarily.
The body is what everything is bolted to, whether it be monitors, lens mounts, RED MINI-MAG, audio ports, video outputs, everything. It also handles all of the codec work.
You’ll be able to work with everything up to ProRes 4444 and ProRes 422 HQ, along with up to DNxHR HQX and DNxHD 444/HQX, just to name a few. Internal saving is done on the RED MINI-MAG drives, and there are no other options for internal recording.
You do get dual stereo mics, but XLR connectivity requires an expander module. This also will provide SDI and HDMI, so you’ll most likely need this module. There are different monitor options available, namely 4.7″ and 9″ versions along with EVF options.
Unfortunately, due to the modular nature of the system, you actually need to separately purchase the lens mount for whichever lens system you want to use. Yes, you read that right–you can’t even attach a lens without an additional accessory.
But you can’t even use a DC power connector without the expander, so, it’s just the way that RED does things. At least it has an AC adapter, but if you’re rocking V-mount batteries, you’ll be paying for the privilege.
But what about the resolutions, frame rates, dynamic range, and RED-specific codec options? Well, those are all determined by which sensor you pick with the DSMC2, and there are four different options that are in the current generation.
RED DIGITAL CINEMA DSMC2 BRAIN with MONSTRO 8K VV Sensor
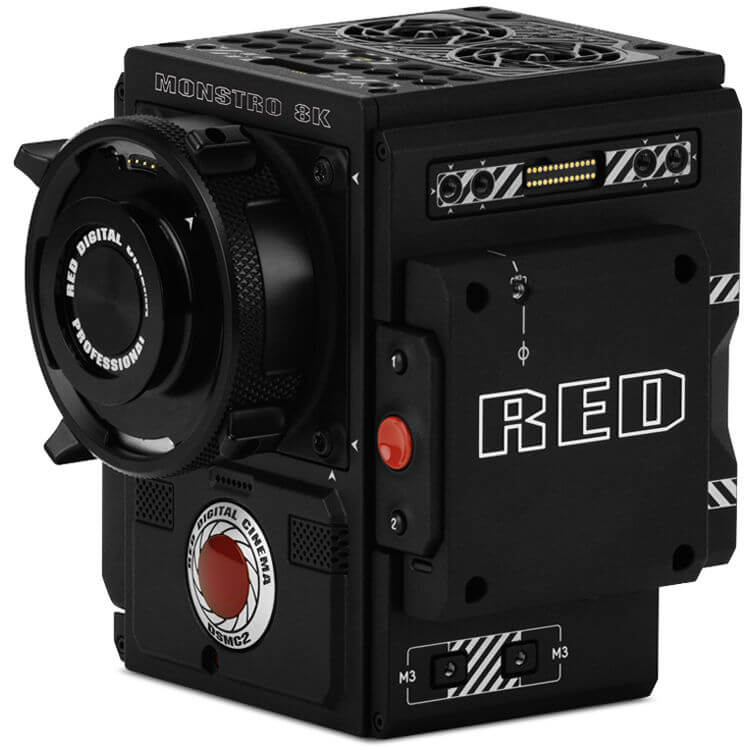
The Monstro 8K VV is the big boy of the group, as it is an 8K full frame sensor in VistaVision (VV) format. It offers the most dynamic range at 17+ stops, and can top out full 8K footage at 60fps, 4K at 120fps, and even 2K at 240fps. It does support REDCODE at various compressions (all sensors vary on the compression rates, see the specs on this if you need to know) along with REDCODE RAW in a multitude of compression ratios (same notes apply here).
Check the lowest price on: Amazon | B&H Photo
RED DIGITAL CINEMA DSMC2 BRAIN with HELIUM 8K S35 Sensor
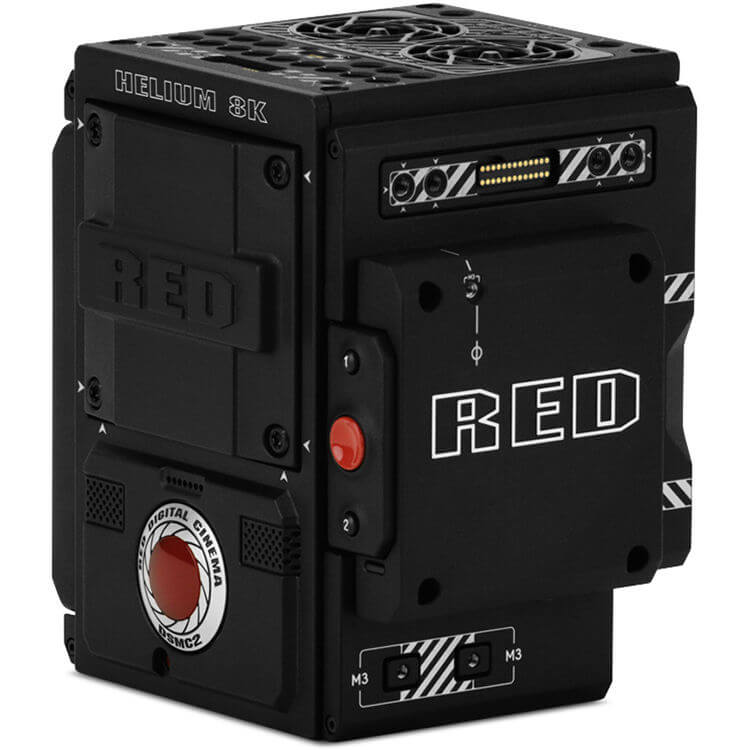
The Helium 8K S35 is nearly identical to the Monstro, however the sensor size is a Super 35mm. While all the frame rates, resolutions, and codec options are the same, technically it does have a slightly lower dynamic range of 16.5+ (mind you, this is still insanely high).
Check the lowest price on: Amazon | B&H Photo
RED DIGITAL CINEMA DSMC2 BRAIN with GEMINI 5K S35 Sensor
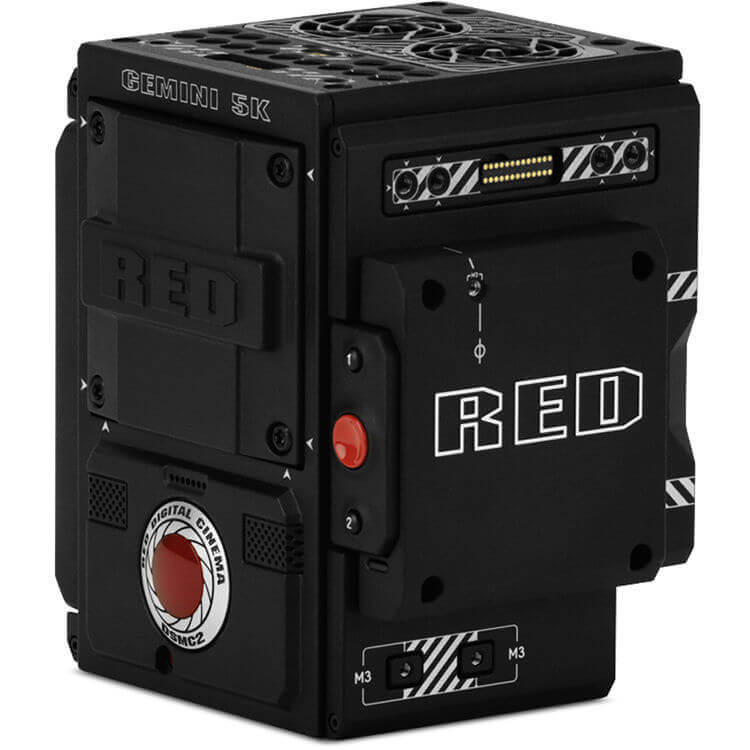
The Gemini 5K S35 (B&H Photo) is a whole different beast. At less than half the megapixel count than the other two (15.4MP vs 35.4MP), this is a low light sensor. Dual sensitivity modes and larger pixels due to the lower pixel count equate to much improved low light performance. It is only a 5K sensor, but does offer basically the same frame rates and codec options as the bigger brothers.
Check the lowest price on: Amazon | B&H Photo
RED DIGITAL CINEMA DSMC2 BRAIN with DRAGON-X 5K Sensor

The last addition to the sensor lineup is the Dragon-X 5K S35. This is basically the no-frills 5K RED camera that slides into the entry level spot once held by the RED Raven up until recently. Slightly less pixels than the Gemini at 13.8MP, but offers most of the same options in frame rates, resolutions (up to that 5K limit, of course), and codec/compression options.
The benefit of the streamlining of the entry level sensor into the DSMC2 body is that now you have a much more smooth upgrade path from the Dragon-X into a Helium or Monstro sensor when that time arrives. Those who went for the Raven will need to replace their camera bodies as well as their sensors.
Check the lowest price on: Amazon | B&H Photo
Legacy RED camera bodies
You may see mentions of the old Epic bodies, or the Mysterium-X sensors, or more likely the RED Raven. Kitted out, the Raven was a 4K camera for under ten grand, which at the time was pretty insane. Unfortunately, this budget 4K camera is no longer around, and the DSMC2 Dragon-X has supplanted it.
The Scarlet-X has also been replaced by the DSMC2 Dragon-X, but this is less of a jump as the Scarlet-W was pretty much the precursor to the DSMC2 body, and is cheaper to buy a DSMC2 Dragon-X than to pick up a Scarlet-W and pay the upgrade cost.
In general, unless you’re buying used and getting a great deal, it’s more often a better deal to pick up the current line of RED cameras. It’s less convoluted these days, upgrade paths are much better, and the new brains are definitely improved.
Despite all the extra purchases and weird gotchas that come along with RED cameras, they’re an amazing tool for filmmakers and definitely rank among the best cinema cameras you can buy (or rent).
ARRI ALEXA
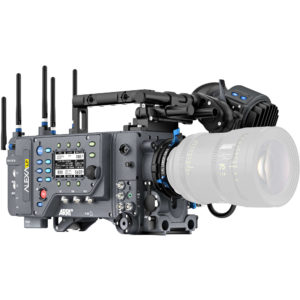
ARRI has been a staple in the film and TV industry for a very long time. Formed in 1917, they released their first film camera in 1924, and subsequently shaped the entire cinematography industry with the ARRIFLEX 35 in 1937. Almost all professional motion picture film cameras are based on this camera’s reflex mirror shutter design, and the design is still going strong.
ARRI’s ALEXA digital cinema camera was released in 2010 and shook things up. Built on the same principals of the ARRIFLEX, the ALEXA brought the holy grail to filmmakers: digital video that had astounding dynamic range, a look that is truly filmic, and every feature any professional DP or filmmaker would need on the job in a rock solid reliable package.
There have been several ALEXA digital cine cameras over the last near-decade, but right now there are a few cameras that make up the core of the ALEXA line that you should be aware of.
We’re not going into a lot of detail on the ALEXA. Not only are most of the features are similar to other cine cameras on paper, but, to be honest, more than the overview isn’t really important here. If you don’t know about these cameras, you’re most likely financially ready to own one. These are the professional gear, and they’re priced accordingly.
ARRI ALEXA LF
Where the original ALEXA cameras were all using the ALEV III 2.8K sensor, the ALEXA LF is a true 4K large format sensor (hence the LF in the name). It inherits all of the legacy from the previous iterations, the 4K and sheer sensor size are what finally brings this camera line into the modern era of RED cameras and their brethren.
The ALEXA LF is the current flagship of the ARRI lineup. With the new 4K sensor, you can really take advantage of all the codec options offered, being ProRes, DNxHD, and ARRIRAW, the latter offering an insane 16-bit raw footage.
The color science of the ALEXA is pretty much unmatched. Skin tones are not only accurate and detailed, but highly pleasing. Dynamic range is among the best, if not top of the class. Highlight roll off is smooth and pleasing, and in general the ALEXA is the workhorse of many a director of photography for all these reasons and then some.
ARRI ALEXA Mini LF
Sometimes names are difficult to decode, but fortunately that’s not the case with the ALEXA Mini LF. This is a smaller–much smaller–version of the ALEXA LF, initially developed for mobile mounts, drones, and other situations that benefit from a small form factor camera with stunning video quality.
The ALEXA Mini LF has the same sensor as the ALEXA LF, along with most of the other features and controls on the bigger version. You can strip off the viewfinder or display if you need an even smaller payload for a gimbal or drone, all while matching your A-cam big brother.
The Mini LF has become one of the most popular cameras in the film and TV industry since its initial release, and quickly found its way onto countless production crews thanks to its durability, reliability, small size and incredible image quality. It may take more gear to kit out for a non-mobile shooting environment, but if you need the small size, this is an amazing camera.
ALEXA AMIRA
The AMIRA is an interesting camera to fit into the ALEXA line. It’s definitely cheaper than the ALEXA LF, and is actually built to compete with the Canon C200 and the like.
The AMIRA is an ENG style camera, or Electronic News Gathering. It’s built to be a self-contained camera not requiring a huge rig to make it work. Slap on a lens, battery, and storage device, and you’re good to go.
Thanks to this design, it’s great for documentary filmmakers, low budget movie crews, or anything else where you need run and gun flexibility with ARRI visuals. It does support 4K, assuming you purchase the UHD license, and can support up to ProRes 4444.
As we said before, it’s an interesting camera in the lineup, and for some people it’s the absolute perfect camera for a number of users. If money is no object and you want to jump from the Canon cine lineup, look at the AMIRA.
Cinema camera rentals
If you’ve been looking at the cameras listed and getting a (perhaps not so) mild case of sticker shock, you’re not alone. Many filmmakers rent the camera that they choose for that particular job instead of owning the camera themselves. With cameras that can cost $10,000 and up, this is often the only option for many up-and-coming filmmakers and is a very widespread behavior in the industry.
Renting cinema cameras instead of buying is a great way of testing out which gear you like and get some practice without committing to a full purchase. As a photographer I would rent gear frequently for specific projects, or if I just wanted to test something I was contemplating buying to add to my camera bag.
There are many rental houses available, and most likely there is one near you locally. Some of our favorites are BorrowLenses and LensRentals, both with extremely knowledgeable staff, extensive inventory, and are very cost-efficient. They make it very easy to test out new gear or rent job-specific gear that you don’t currently own with flexible rental terms for however long you need the gear.
If you end up renting a camera extremely frequently, it may be beneficial to finally pull the trigger on a purchase. If you’re working frequently enough to make it worthwhile, owning the gear could be a good option, that way the camera is always on hand.
Fortunately, most freelance cinematographers do build in a rental fee in addition to their own job fees, so you could actually have a situation where the camera will end up literally paying for itself after a period of time. Just because you own the gear doesn’t mean that the client isn’t technically renting the gear from you for the job, so it definitely takes the sting out of buying a RED or ALEXA a little bit at a time.
Final thoughts
Cinema cameras occupy a fairly interesting spot in the realm of video cameras. Their visual quality is often unmatched, yet are usually highly specialized devices for the professional cinematographers for use within the motion picture industry. They’re definitely not for everyone who’s making video content, and do involve more than just pointing and shooting.
But that’s not necessarily a bad thing at all. If you’re looking to elevate your video projects or want to make films, you’re going to absolutely want to step up to the bigger pro cameras over the run of the mill DSLR or camcorder.
Thankfully not all cinema cameras need to cost the same as a new car, finally bringing pro-level cine cameras into the reach of nearly anyone. While the ALEXA may be unattainable for most independent filmmakers, even RED has relatively affordable options compared to what was available in years and decades past.
Whether you’re making films with actual budgets or shooting short projects for YouTube, there’s definitely a great cinema camera for every filmmaker and every budget.
We’re in a golden era for small, independent storytellers to grow and thrive and these cameras–and cameras to come–are just making things much more accessible. But at the end of the day, remember: it’s not the camera that makes a story memorable, it’s the story that makes the story memorable. It’s not the arrow, it’s the archer.


0 thoughts on “The ultimate cinema video camera buying guide [2022]”