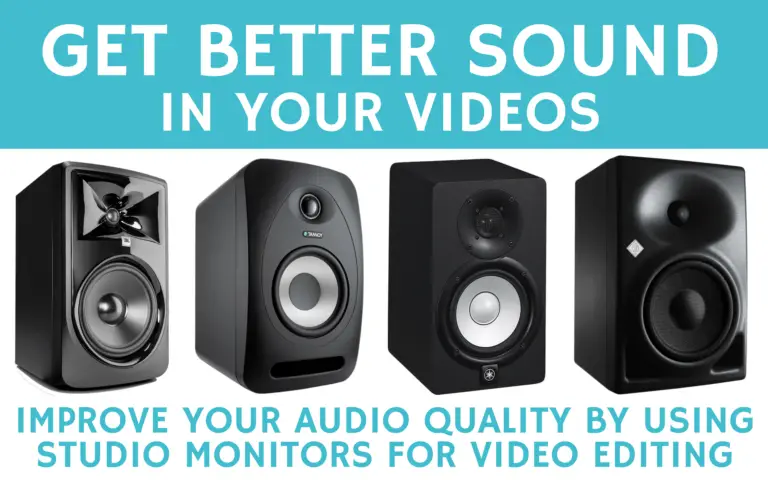
Audio is arguably the most important part of video creation. Yes, you can have spot-on exposure and lighting, but if your audio is sub-par, it can not only come off as amateurish but also be downright annoying. Even if your source recording is good, how do you know what post-production correction and enhancements need to be done, and to what extent? If you’re editing on a laptop or low quality computer speakers, well, you’re most likely working off of an imperfect reference point. But with studio monitors, all those issues slip away.
Contents
- 1 What are studio monitors?
- 2 Why do I need studio monitors for content creation?
- 3 What to look for when buying studio monitors
- 4 Studio monitor accessories
- 5 Studio monitor setup
- 6 Learning your new studio monitors
- 7 Final thoughts
What are studio monitors?
In short, studio monitors are speakers that don’t lie or hide things in a mix or edit. Studio monitors–also known as reference monitors–are what is referred to as “flat”. This description is indicative of the visualized frequency response of the speaker. What this really means is that it treats all frequencies–whether high or low or in between–with relative indifference. All the frequencies have roughly the same volume, which in turn represents them all evenly.
This behavior is in direct contrast to most home entertainment or consumer use speakers. Your general consumer stereo/hi-fi/whatever equipment is directly built to enhance the music played through it. This means, usually, that there are more present bass and airy highs than what was actually in the original recording. Simply put, home theater and consumer audio gear are meant to put emphasis on audio elements that will make things sound better to you.
Why do I need studio monitors for content creation?

So studio monitors don’t hype up certain frequency bands. But why is this necessary? Well, in a content creation aspect, your goal is to make your product the best it possibly can on as many of your potential audience’s devices as you can.
Part of this is not just the creative aspect of your audio mix (bringing vocals just a bit more out front at the right point, nudging the bassline up during the chorus, or dropping the rhythm guitars just a tiny amount to give the solo more room), but the technical aspect of how your mix sounds on your listeners’ devices.
With the output being a flat reproduction of the input, it gives you a good representation–or reference–to the original recording. It also means that you will be creating audio with a neutral reference point, relatively speaking. Your bass won’t be too much and distort your audience’s earbuds, but you’ll also be pumping enough low end to drive a good set of over-the-ear headphones.
Really, the studio monitors’ job is to provide you with an accurate representation of the audio your mics captured, and then edit or mix that audio in a manner that will sound good across all sorts of devices. Earbuds, home hi-fi setups, TVs with mediocre built-in speakers, your smartphone speaker, your car stereo, and so forth.
The studio monitors are a middle point between the great and not-so-great, yet still letting you accurately hear all of the frequencies that you need to work with.
If you’re mixing music or editing videos on a bad (as in highly inaccurate) set of computer speakers, it may sound completely anemic on anything even a bit better quality. And remember: more than anything else in content creation, audio is absolutely crucial.
What to look for when buying studio monitors
There are a few things to keep in mind when searching for a new set of studio monitors. Most are fairly straightforward, but there will be some new elements that can influence your choice for a new pair of studio monitors.
Price
This is one of the straightforward ones. Your budget will, of course, be different than the next person’s budget, but keep in mind there are a few broad categories of prices.
Just for the sake of consistency and simplicity, we’ll base these groupings off of the popular speaker size of a 5″ driver. The example studio monitors referenced, however, will cover all sizes to provide a good look at what you have available as you scale up either your budget or desired speaker size.
Also, the majority of studio monitors are sold individually, however, there are often a “single” and “pair” SKU in many stores. Most of these will be single speakers referenced for simplicity and even comparison.
Around $100 per speaker (or $200 a pair) or less
This is the bottom rung, where most speakers will be 4″ drivers or less, with maybe a handful of 5″ options. You won’t get much for your money here, and most of the time I’ll advise against buying in this category.
If you absolutely need something in this price range, tread carefully, as you won’t get much low end (think nothing below 60Hz at best), and the volume won’t be enough for mid- to large-size rooms. You’ll also notice that there are more “per-pair” models in this price range than in the next few.
What you’ll also notice is that I’m not listing any examples in this category. Honestly, for any audio work that even matters a little bit, there’s nothing in this category worth spending money on, in my opinion. Save your cash for the next group, at least.
Around $150-$200 per speaker
You’ll start seeing that this price range is the start of some quality speakers. Many of the most popular lower priced studio monitors come in this range, such as the newcomer–and budget studio monitor darling–Kali Audio LP-6 (which has been earning rave reviews recently) along with classics like the Yamaha HS5, JBL 305P MKII, KRK ROKIT 5 G3, and Tannoy Reveal 502, which happens to be my current personal favorite studio monitor at this price range.
You’ll start to get some reasonable low end, but nothing that will thump your chest. Nowadays, you can occasionally find a 6″ or 6.5″ driver at the top end of this price range though, so that’s definitely an upgrade if you have the space for it.
Best studio monitors for $150-$200 per speaker:
- Tannoy REVEAL 502 Studio Monitor
- Kali Audio LP-6 Studio Monitor
- Yamaha HS5 Powered Studio Monitor
- JBL 305P MkII 5″ 2-Way Powered Studio Monitor
- KRK RP5G3-NA Rokit 5 Generation 3 Powered Monitor
- Adam Audio F5 5 Powered Studio Monitor
Around $250-$400 per speaker
Here’s where you start getting into some really nice, yet still affordable studio monitors. Higher end brands like Focal, Genelec, and Dynaudio start popping up with 5″ drivers, while the brands that thrive in the lower price group have larger 6″, 6.5″, 7″ and 8″ drivers in this category. There are even a few dual driver cabinets to be had in this group as well.
Best studio monitors for $250-$400 per speaker:
- Tannoy Reveal 802 Studio Monitor
- Kali Audio LP-6 Studio Monitor
- JBL 308P MkII 8 2-Way Powered Studio Monitor
- FOCAL Alpha 50 Studio Monitor
- Yamaha HS8 Studio Monitor
- ADAM Audio A3X Powered Studio Monitor
Around $450 to $800 per speaker
This is right where you’ll find both larger and higher-end studio monitors. These are geared toward more critical, clinical audio work, such as higher-end home studios, project studios, smaller pro studios, and people with a ton of money for hobbies. A lot of this group also have offerings in the previous ones, but this is where the “serious monitors” start to reside. Basically, if you make your living on critical audio work, you’ll eventually get to this price range.
Best studio monitors for $450-$800 per speaker:
- Neumann KH 80 Active DSP Powered Studio Monitor
- Focal Alpha 80 8 Powered Studio Monitor
- Adam Audio A5X Powered Studio Monitor
- Neumann KH 120-A Studio Monitor with Stabilizing Isolation Pad
- Adam Audio A7X Powered Studio Monitor
More than $800 per speaker
For the sake of brevity, we’ll just say that everything else is getting grouped together. Yes, there are definitely plenty of $700-1000 speakers, but then again there’s plenty that are all the way up to over $10,000 per speaker. We’re not going there.
Instead, we’ll just say that if you’re making serious money on your content, and it’s very audio-centric to where you need highly accurate and responsive speakers that can put out the volume to fill up a large space, this is where you’ll most likely be looking. High-end JBLs, Genelecs, ATC, Neumann, Focal, Avantone, Blue Sky speakers are what you’ll find. They’re nice, but they’re not what we’re all about here today.
Size
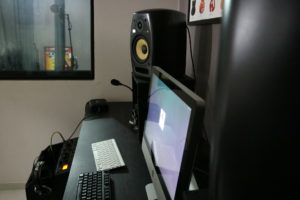
When we talk studio monitor size, we’re not just talking about the physical size of the cabinets, but the driver sizes. The average bedroom recording studio has 5″ drivers. There’s just usually not much more room for anything larger in a small space, and not just physically.
You need to look at the room in which these speakers will reside. Is it a large open floorplan, or a small spare bedroom? Will you have clients over sitting on the couch across the room or everyone tight up at the desk?
Larger speakers take up more desk space, of course, but they can also overpower a small enclosed room, creating detrimental bass frequencies that will just ruin your accuracy. Same as a small speaker can’t generate the volume to get a room sounding the way it should. Smaller drivers also won’t reproduce as many low frequencies, so keep that in mind.
Basically, if you’re in a bedroom situation, 5″ is the sweet spot. If you’re in a garage-sized space, start looking at 6″ to 8″ drivers.
Frequency range
Frequency range represents what the speaker is able to physically push out of the driver and tweeter. Usually something like 43Hz-24kHz (hertz and kilohertz, respectively), this tells you how low a frequency the speaker can make, and how high a frequency it can produce.
In the lower price ranges, you’ll notice that the low-end frequencies are not covered as much as on more expensive (and larger) speakers. With 5″ studio monitors and smaller, you’ll rarely get down to the low 40Hz range, with most at the high 40’s or 50’s. There are exceptions, but typically if you want thumping bass you’re looking at minimum 6″ drivers.
Depending on what you’re doing, you may not need the super low frequencies. If you make metal, hip-hop, EDM, you’ll want that low frequency. If all you do is spoken word, well, it’s not that as crucial to have it.
It will still help to have the most range possible, because you will have a better, more accurate representation of your final product, allowing you to identify problem areas, such as flubby bass or annoying highs.
Port location
A large portion of speaker cabinets work on the foundation of having a bass port. It’s basically a hole in the enclosure where bass frequencies get ejected so that they don’t build up in the case and get out of control. This port is usually either on the front or the back of the speakers.
This is important when you’re working in smaller spaces, or need to have your speakers within at least a foot from the wall. If you put rear-ported studio monitors next to the wall, it will start to cause odd behaviors in the low frequencies. Those frequencies will build up, reflect back at you in odd ways, and basically alter what your ears are hearing. This will give you a bad representation of what it actually sounds like elsewhere.
If you’re in a bedroom, stick with front-ported speakers. If you get your mix position off of the wall (which is usually how recording studios do it), it doesn’t matter nearly as much.
Inputs
Odds are, if you’re looking at studio monitors, you already have an audio interface of some sort. These interfaces usually have several types of outputs that you would need to be able to connect to your monitors.
The best input on a monitor is a balanced XLR input, which has the lowest noise and best signal. Your interface may have balanced XLR outputs or balanced 1/4″ TRS outputs (you can get balanced 1/4″ TRS to balanced XLR cables). This is definitely the best way to connect your monitors to your interface.
If you have a lower end interface you might only have unbalanced 1/4″ TRS outputs, but most monitors have a combination of balanced XLR, balanced and unbalanced 1/4″ inputs, and sometimes RCA inputs. Some, like the Tannoy Reveal 502, also have a 3.5mm TRS AUX input for use with a phone or other device without needing an audio interface.
Overall quality and detail in reproduction
Obviously, you want speakers that sound good. For mixing, recording, and other content creation you want a set of monitors that will accurately represent your final product.
All speakers will sound different compared to another, and they will sound better or worse to different people. The key is to find a set of speakers that have the physical features you need, and then audition them for as much time as possible in a good space.
Personally, I have not really liked how the KRK ROKIT 5 sounds to me. But there are a ton of people who swear by them. The Yamaha HS5 has some very upfront mids to my ear. Not a bad thing, but for tasks other than straight up audio mixing, maybe not the best. Some people find the Tannoy Reveal 502 to be too “round”, and they like the slight mid boost of the HS5, yet these are the studio monitors that I picked as my favorites.
Thankfully it’s all very subjective, and the key is to find what works for you, and what sounds good to you with music and content you’re already intimately familiar with.
Places like Guitar Center and Sweetwater have pro audio rooms (hopefully) where you can audition several sets of monitors and get a good feel for what they do. Be sure to try and use source material that is similar to what you will be working on, and listen at multiple volume levels. Don’t just crank them up–some of your best critical listening comes at a lower than average volume level.
Studio monitor accessories
Once you’ve picked out your monitors, there are a few other things that you should definitely consider buying. The first and cheapest would be a set of acoustic isolation pads.
Isolation pads are foam pads that go on top of your desk, and the studio monitor sits on top of the pad. While, yes, they do help raise the speakers closer to ear level (usually the proper positioning for monitors), the real purpose is to decouple the vibrations of the speaker cabinet from your desk.
This eliminates any weird buzzing or other effects caused by the speaker vibrating the surface on which it sits, and results in a cleaner sound. Not to mention cuts down on sound pollution coming through the speaker, to the desk, and down the desk legs into the floor. This is a real problem when you share a house with other people or have to work on projects while others are sleeping.
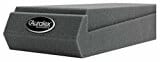 Auralex Acoustics MoPAD acoustic isolation pads are what I picked up, and do an excellent job. Unfortunately, they seem to be ridiculously expensive at this point, so take a look at some of the other options for studio monitor isolation pads available.
 There are also desktop isolation stands that look a bit more premium and offer more adjustability, but you’ll definitely pay more for those. One example would be the IsoAcoustics ISO-L8R155 Acoustic Isolation Stands. These do an amazing job of decoupling your speaker from the desk surface and clean up the low end of your speaker output. I’ve been contemplating picking up a pair eventually, as I keep reading consistently positive reviews, and they may really help tighten up the bass frequencies in my small room.
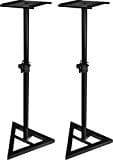
The third common solution here would be a set of completely independent floor stands, such as the Ultimate Support JS-MS70 JamStands. It looks like a lot of these available all share very suspiciously similar design, so I’m sure many of these will be pretty identical. But I have always had trust in Ultimate Support equipment since I was a kid because of my dad’s reliance on their PA speaker stands, so I’ll link those up here.
 For best results, you can place these stands in the optimal positioning off of your desk, and then set your monitors on isolation pads or isolation stands on the speaker stands.
Other than this, however, there’s really not much else you’d need other than a decent quality speaker cable, and really anything name-brand will do. I picked up a pair of Hosa cables, and they’re solid and get the job done.
Studio monitor setup
Now that you’ve got your studio monitors and whatever stands or pads you opted for, time to set them up. First things first, read the manuals that came with your monitors for how they’re designed to be spaced and oriented.
The majority of monitors are made to be sat vertically and will specifically tell you not to lay them horizontally. Usually, the instructions also say that the tweeters should be at ear level, and this shouldn’t be too difficult to achieve with your pads or stands. Again though, check the manual for specifics.
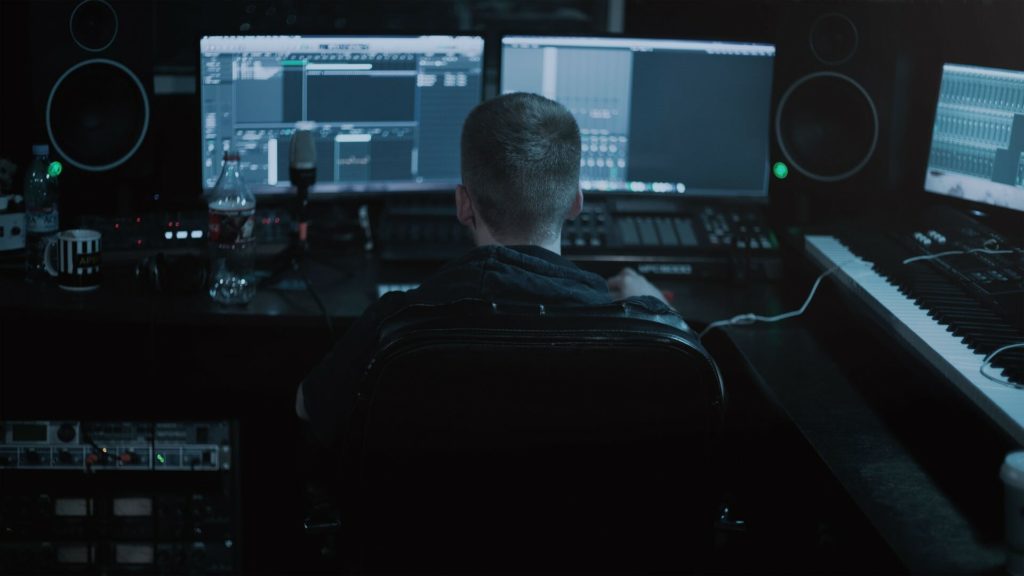
The one golden rule with studio monitors, however, relates to the spacing between the two speakers, and between each of those speakers and your head, or what is often referred to as your “listening position”.
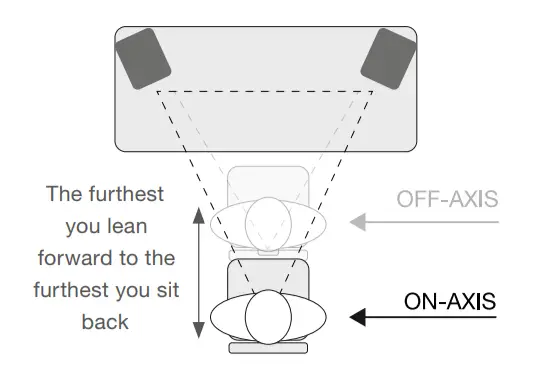 Listening position is the location in your room where you will be sitting when working on critical audio tasks. Basically, your ears should stay within a certain area in relation to the speakers for the best accuracy.
Your two speakers and your listening position should be forming an equilateral triangle. The distance between the left and right speaker should be the same as the distance between the left speaker and your left ear, and between the right speaker and your right ear.
No matter what studio monitors you end up buying, this rule is almost always part of accurate listening. If you were to lean too far forward, backward, or to either side, you would notice that the tonality and/or balance of the speakers will change.
Because of this, you’ll want to determine your studio monitor listening position first. Evaluate how you sit at your desk, where your body and head are positioned when working and then work backward to find where your speakers should be located.
From here, we can get into the actual positioning of your studio monitors. At this point, you can now figure out whether there’s room on your desk for the monitors on isolation pads, or if they need to be placed further out on separate speaker stands.
You may also notice that, if you don’t want separate stands, you may need a larger desk for your studio monitors, especially if you have an ultrawide or dual display setup. There are a lot of studio-friendly desks out there, and I’ve previously written a guide on buying a home recording studio desk on a budget that you may want to take a look at.
Lastly, look at how far the speakers are from the wall, as this is pretty important for proper bass response. This is super critical, especially for rear-ported studio monitors. It still matters for front-ported speakers, but arguably less so.
You can then angle them in the correct position, as some speakers are designed for a certain angle. Some monitors work best when facing directly forward, not aimed directly at your head, but exactly parallel to either side of you. Others are meant to be aimed directly at your head in your listening position. As usual, check the manual for the correct positioning for your studio monitors.
Now that the speakers have been physically set up in your space, you just need to get the volumes set evenly to make sure your left/right balance is even. Unlike a usual set of computer speakers, each speaker has its own volume control, and these need to be matched.
If you (for some reason) have a decibel meter, time to break this out. If not, you can download one from your smartphone’s app store; be sure to get one that has been tested and validated for your specific phone model so that you know the readouts are accurate.
Get some pink noise audio files and mute one of your speakers. Play the file, with your meter (or phone) in your listening position, making note of the dB it’s reading. Mute that speaker, unmute the other, and see if this one matches. If not, correct one of the two. Rinse, repeat until both speakers are the same loudness.
There are similar processes for calibrating your monitors to certain standards for loudness, but this isn’t always necessary. It helps and is definitely worth looking into, but for now, we’ll just skip over that.
Learning your new studio monitors
Now that you’ve set up and configured your studio monitors, it’s time to start working, right? Wrong. I mean, well, you could just jump into working on production content, but you might be doing yourself a disservice.
Whenever you start working with new speakers, there’s a break-in period for your ears and break. You need to listen to a LOT of content on the speakers that are similar to what you create in order to learn how content is supposed to sound on your speakers.
Listen to a lot of music on your new speakers. A LOT of music. Music that you are very familiar with, and know how it sounds on your old speakers, or in your car. Listen to it both casually and critically.
Make note of how the top end sounds, or how subtle the bass punchiness is. But just listen to music or analogous content to that which you’ll be working on. This is an absolute must so that you know how your mixes or videos will translate on other systems.
Alternate between listening to other content and content you’ve already produced to see how they differ from your old speaker setup. You may notice that the low end is lacking, or is too wubby at certain frequencies. Maybe your old speakers misrepresented the mids and your content is a bit scooped in that range. This is how you’ll start learning to adapt your ears and brain from the old speakers to the new.
After a while, the new speakers will sound more familiar, and you’ll start picking things out that catch your ear as unique and new. Or maybe even revealing flaws in your own work that you didn’t notice before. Start working on less critical projects until you start feeling confident on the new setup.
Final thoughts
Studio monitors will absolutely make any audio-based projects better. With a true, accurate representation of your original audio, you can dial in your final corrections and enhancements in a way that you know will be reliable on a multitude of devices.
After getting over the learning curve of the new speakers you’ll find that your audio-related tasks will be much easier, and will translate to other devices much more seamlessly. You don’t need to break the bank to get started with accurate studio monitors that will help you elevate your video and audio projects.
But what about you? Do you use studio monitors for video editing and other projects? If so, what do you have on your desk and why? Leave a comment below and let us know!


0 thoughts on “Get better sound in your videos with studio monitors”